
發佈日期:
如何在Windows Server 2019‧設定Windows Server Update Service
01. 選擇『Start』、『Windows Administrative Tools』,執行『Windows Server Update Services』。
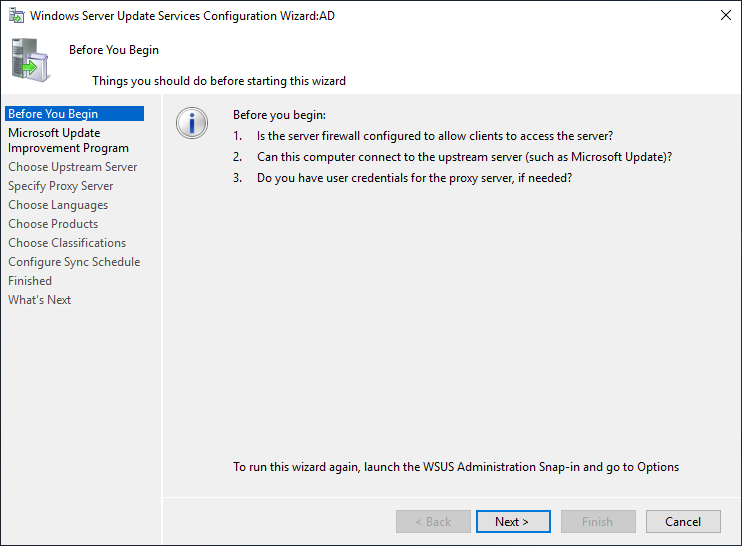
02. 如果是第一次執行,系統會直接打開設置版面。
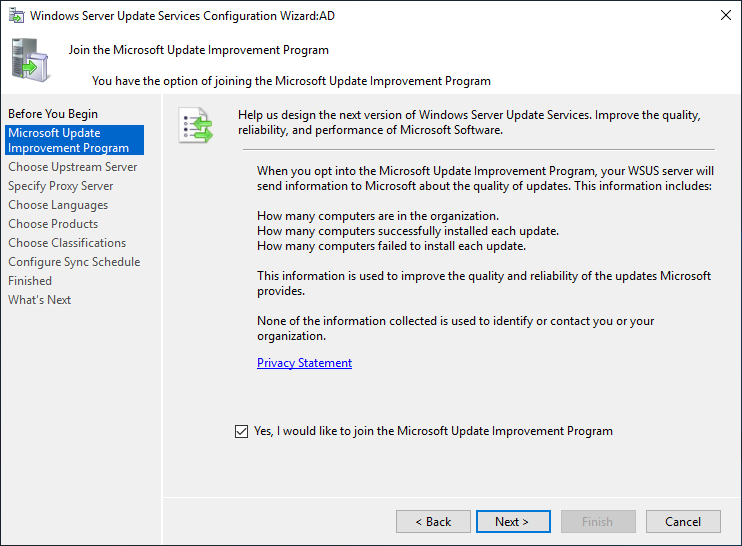
03. 是否接受將自己數據發送到Microsoft作改善之用。
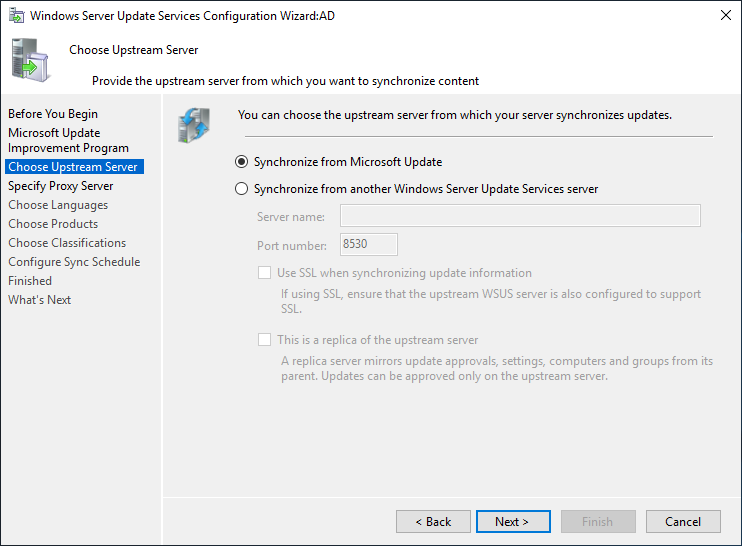
04. 選擇伺服器如何取得Windows Update內容。可以是直接從Microsoft Update或另一隻Windows Server Update Services伺服器。
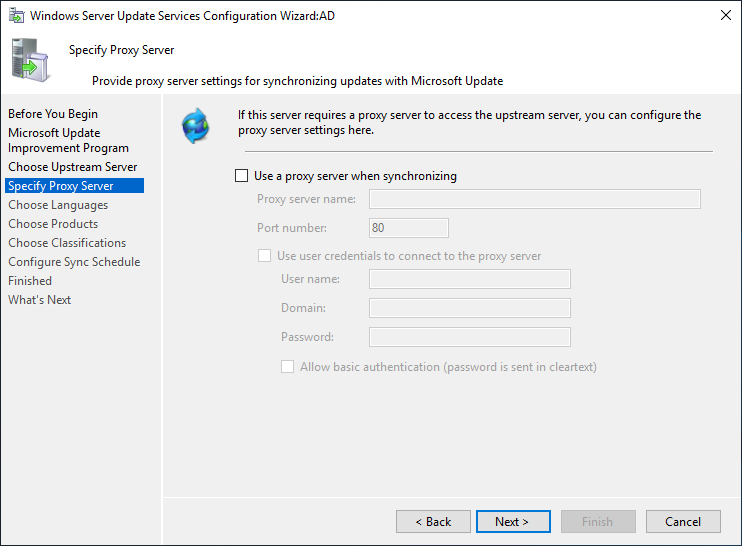
05. 如有Proxy伺服器,可在此位置設定。
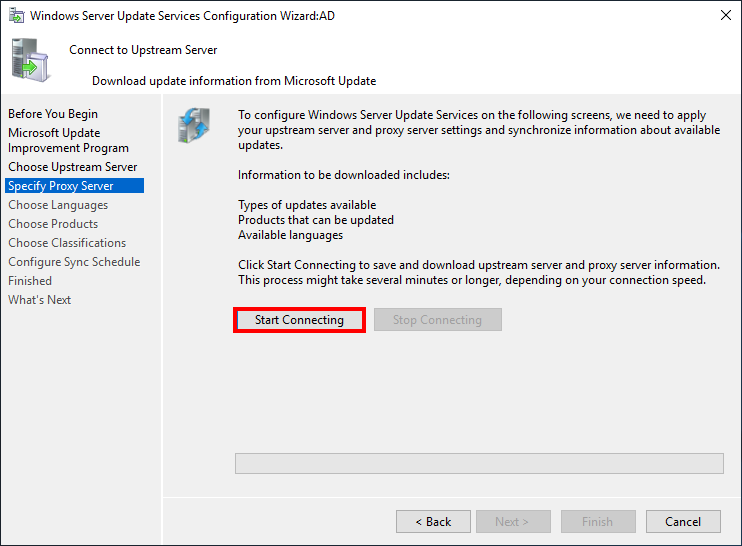
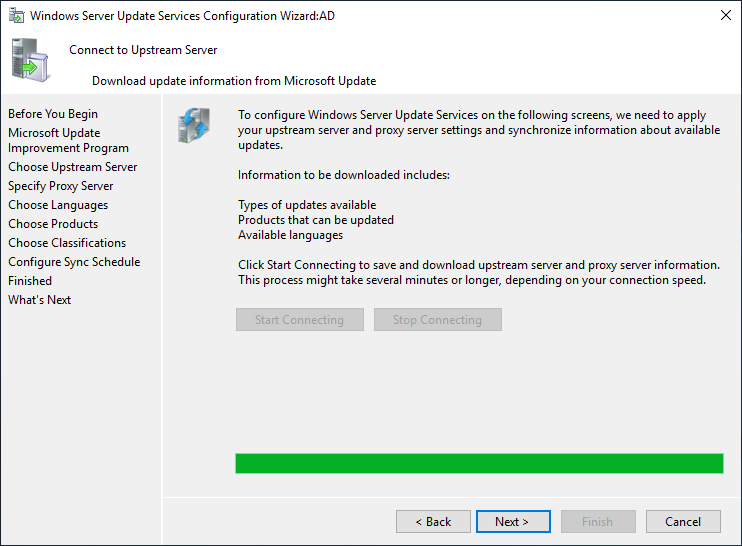
06. 按『Start Connecting』後,程式會根據設定在網絡尋找相關資料。此位置需時有10分鐘以上。
07. 搜尋完成後,按『Next』繼續。
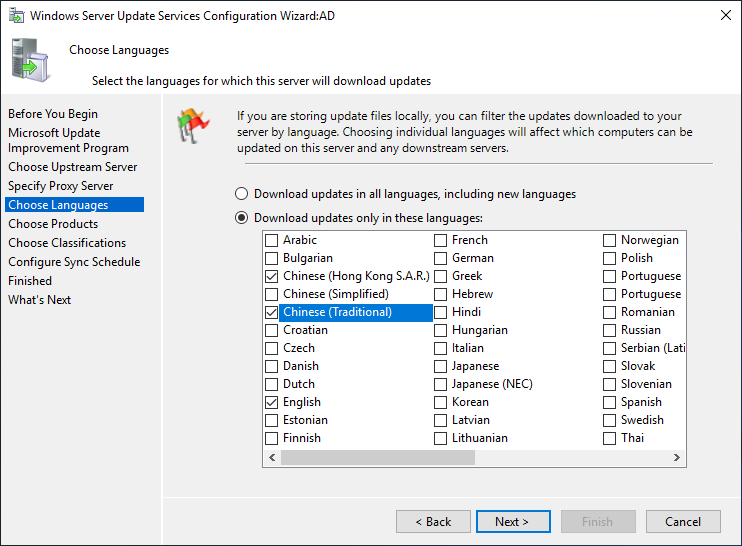
08. 選擇Windows Update時,需提供的語言。注意,每選擇語言,需要儲存的硬碟空間愈多。
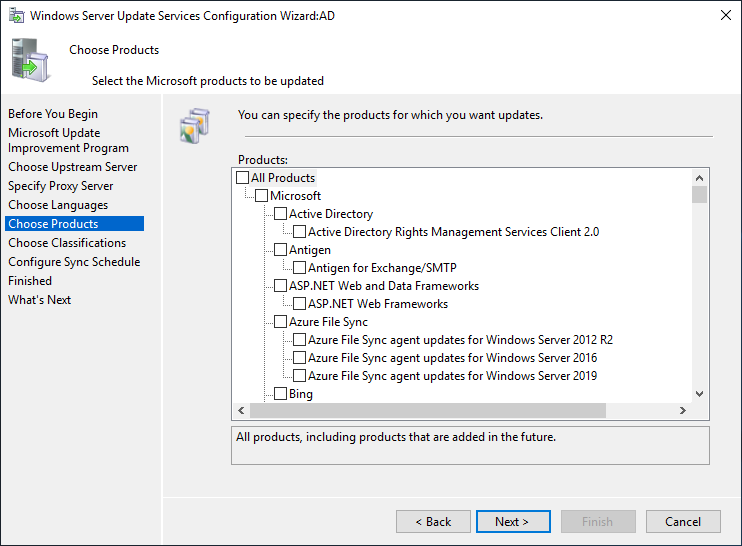
09. 選擇Windows Update時,需提供的軟件。同上面一樣,選擇愈多,需要儲存的硬碟空間愈多。
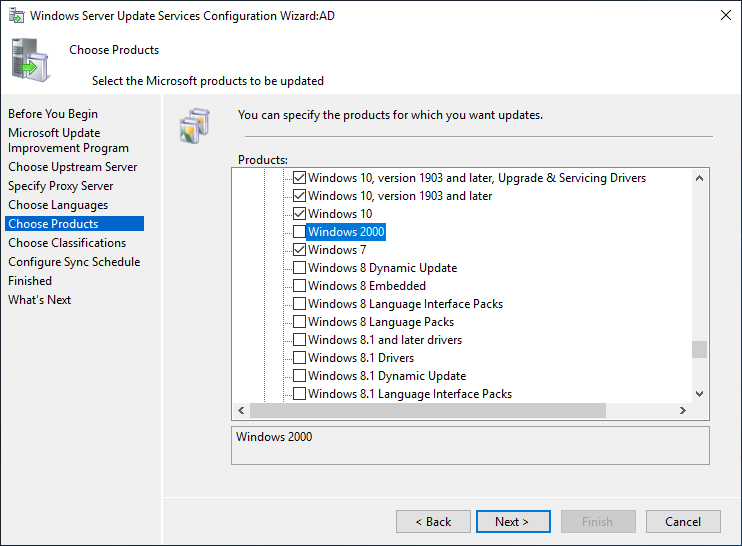
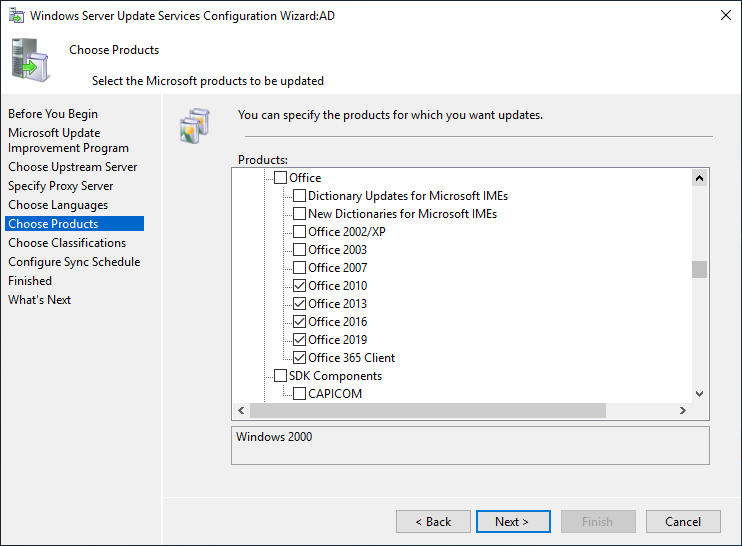
10. 選擇軟件更新時,只要選擇網絡內電腦有安裝的軟件,如已沒有用Windows 2000,就不需要選擇Windows 2000的更新。如Office 2003及2007已沒有電腦再使用,也不需要選擇相關更新。
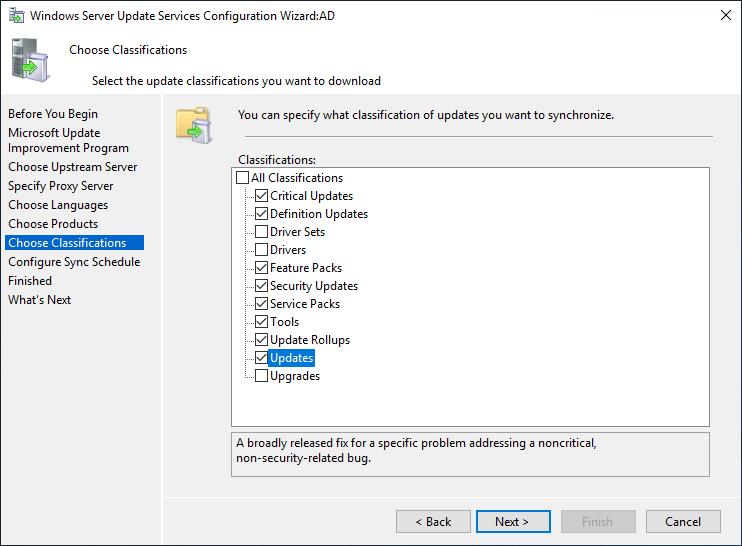
11. 選擇更新類型。我不會選擇『Driver Sets』、『Drivers』,及『Upgrades』。眾所周知,Windowws的驅動程式出名多問題,情願自己在供應商處下載,也不要使用Windows提供的驅動程式。
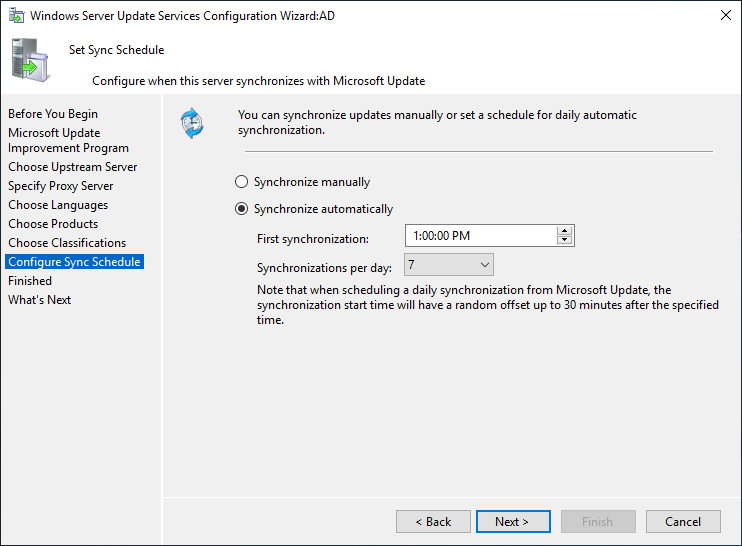
12. 選擇『Synchornize automatically』作為同步選項。
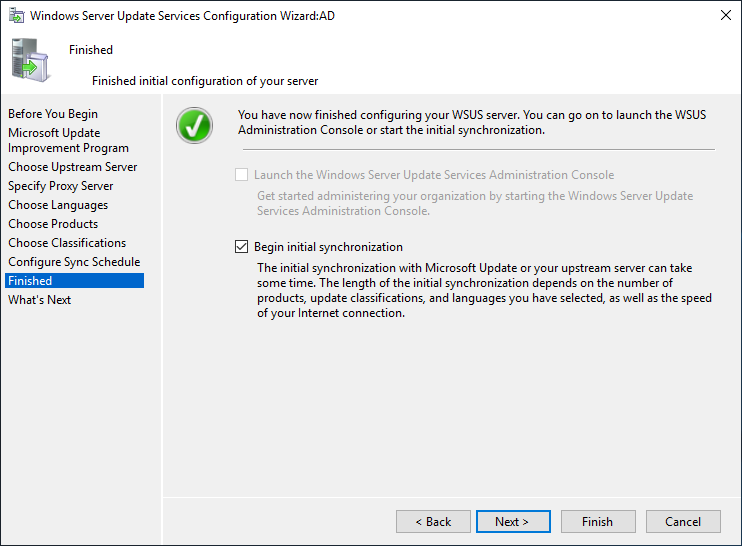
13. 勾選『Begin initial synchornization』及接『Finish』開始更新同步。此位置需時有幾小時以上。
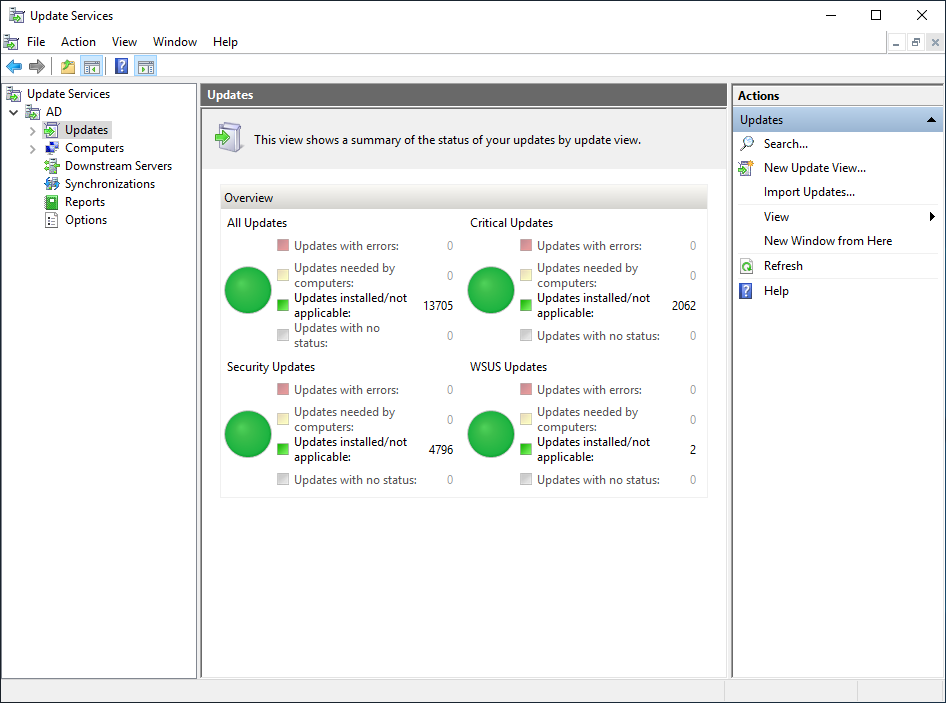
14. 經過一晚的努力,伺服器已完成更新。
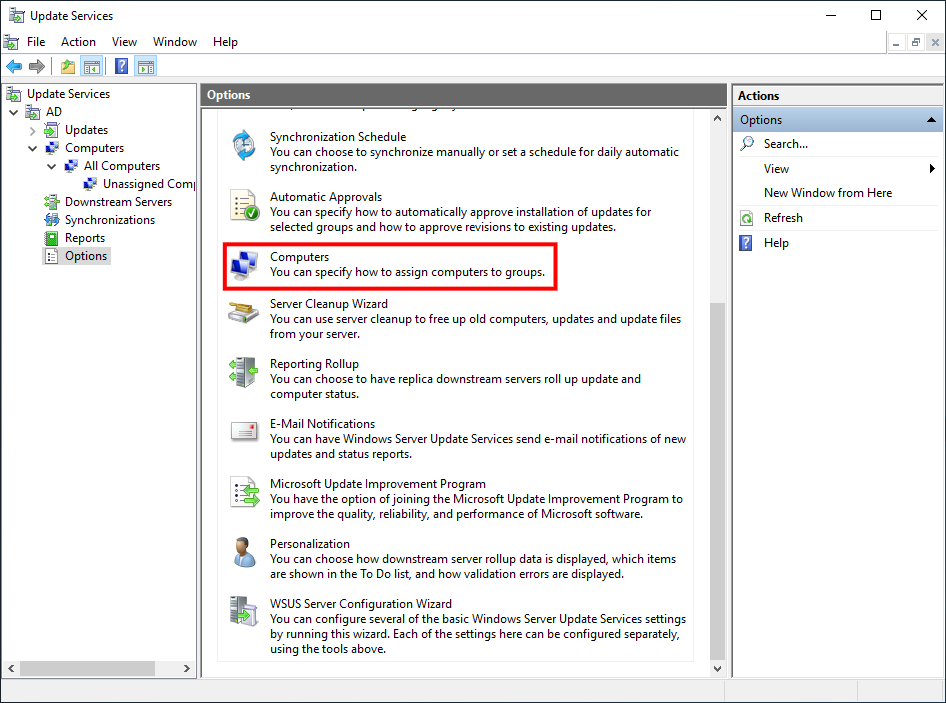
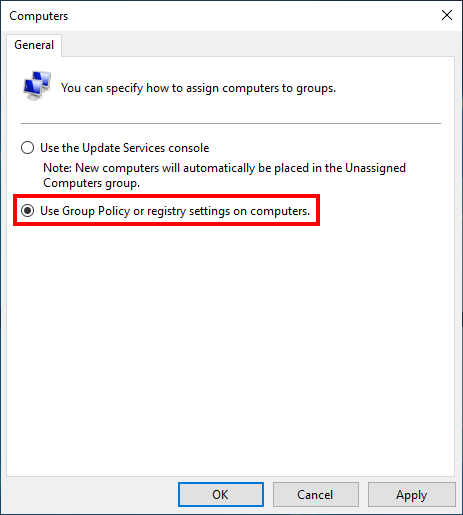
15. 我會選擇用GPO方式,控制客戶端的Windows Update。先在左邊選擇『Options』,右邊選擇『Computers』。
16. 選擇『Use Group Policy or registry settings on computers』一項。
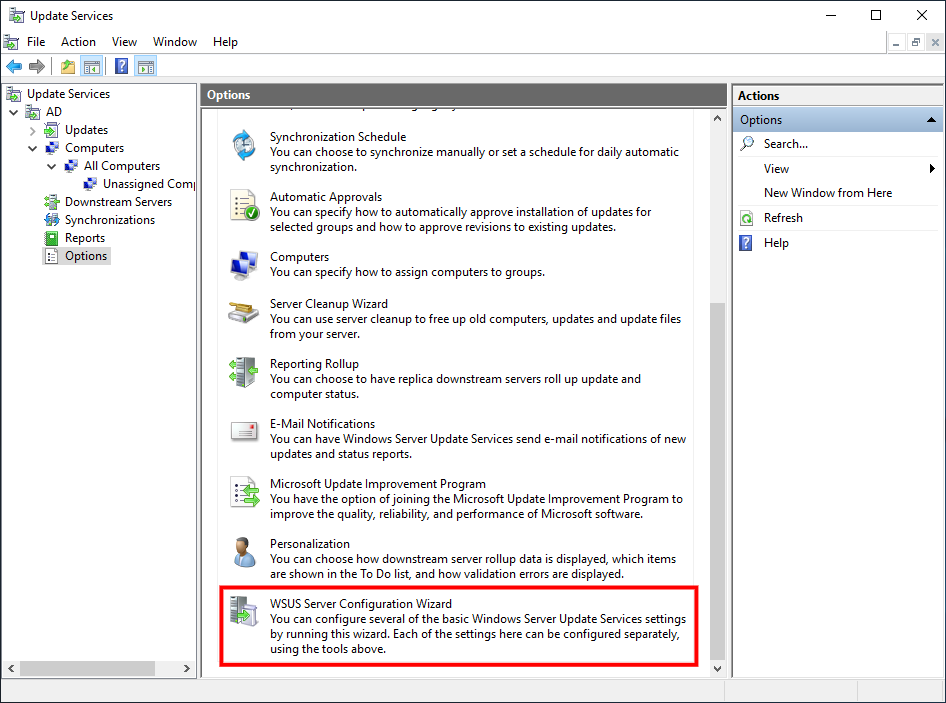
17. 如需要再次執行上面的設定步驟,可執行『Windows Server Update Services』,再在左邊選擇『Options』,右邊選擇『WSUS Server Configuration Wizard』,便可以再次執行設置。
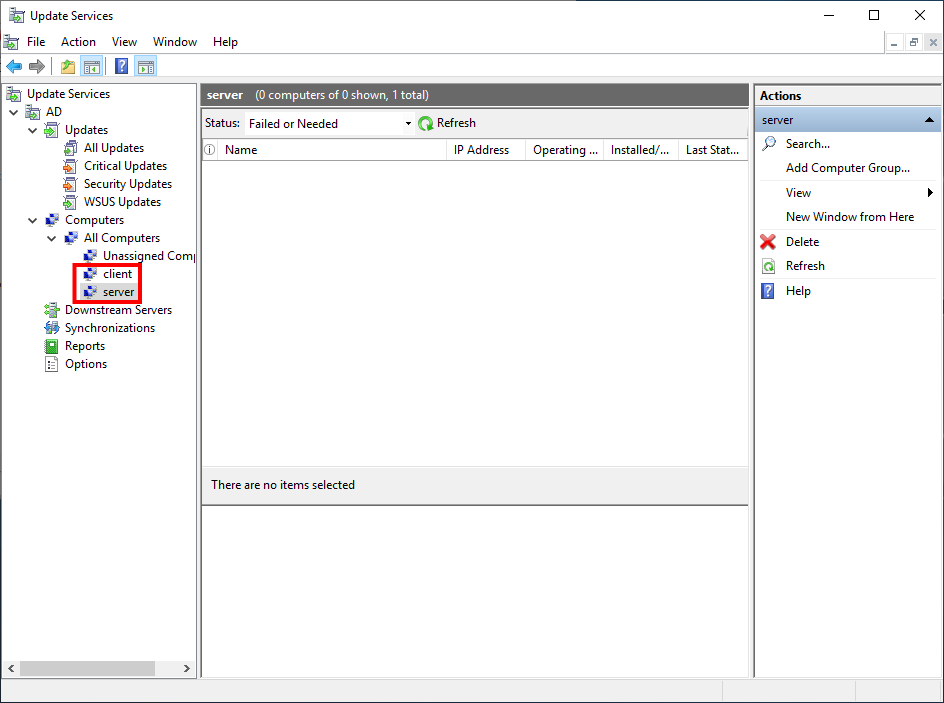
18. 最後,在左邊『Computers』、『All Computers』位置,新增2組電腦群組名稱『server』、『client』,用來區分客戶端伺服器及電腦分別執行不同的windows Update。
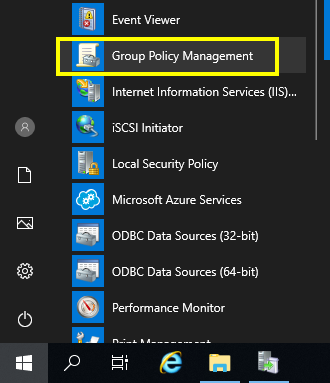
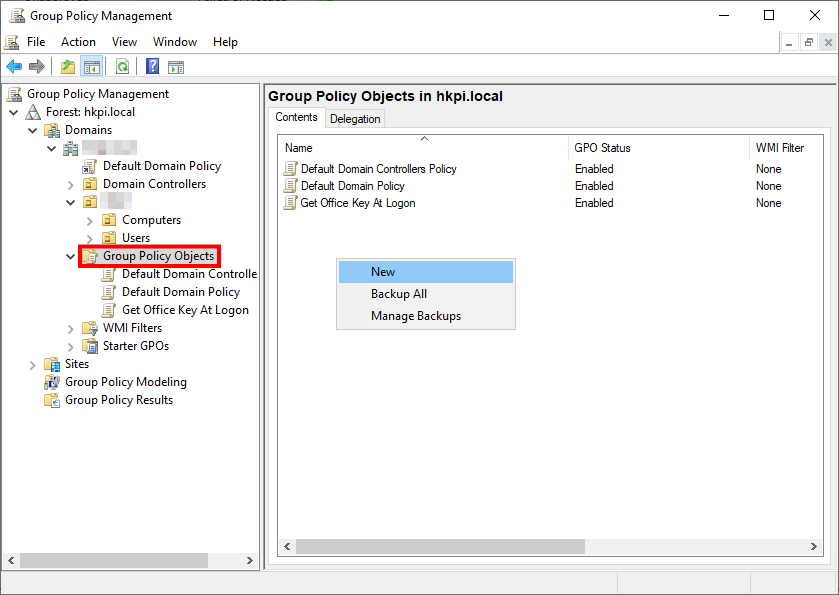
19. 選擇『Start』、『Windows Administrative Tools』,執行『Group Policy Management』。
20. 左邊選擇『Group Policy Objects』,在右邊位置按滑鼠右鍵選擇『New』。
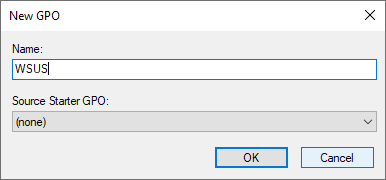
21. 輸入新增GPO名稱。
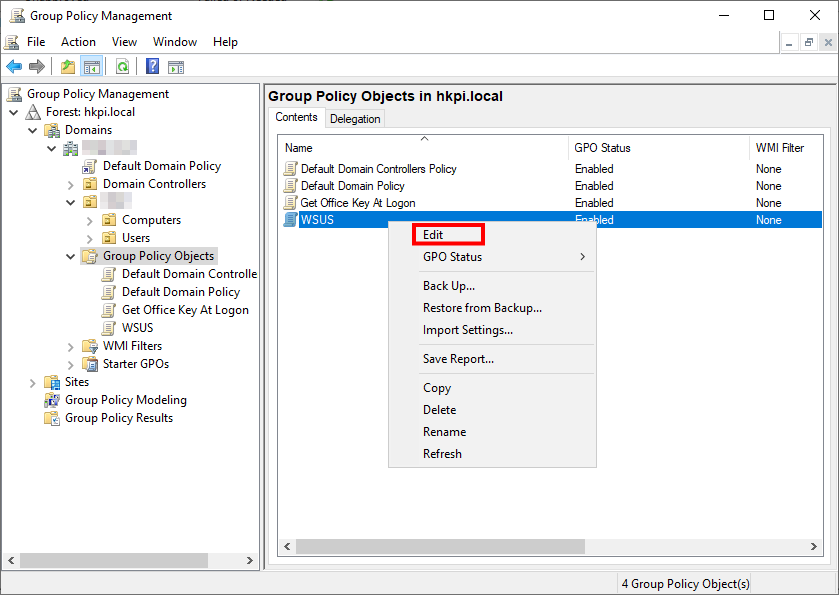
22. 選取新增GPO名稱。按滑鼠右鍵選擇『Edit』。
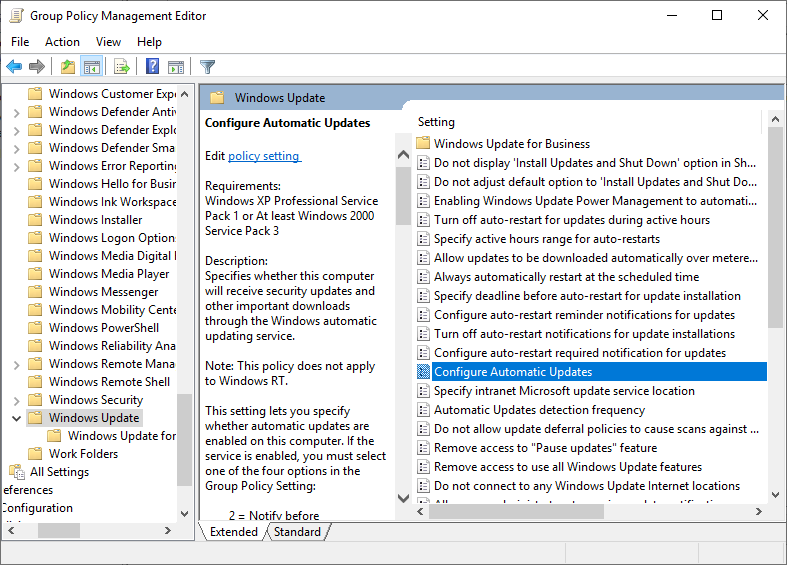
23. 根據下面資料設定相關GPO。
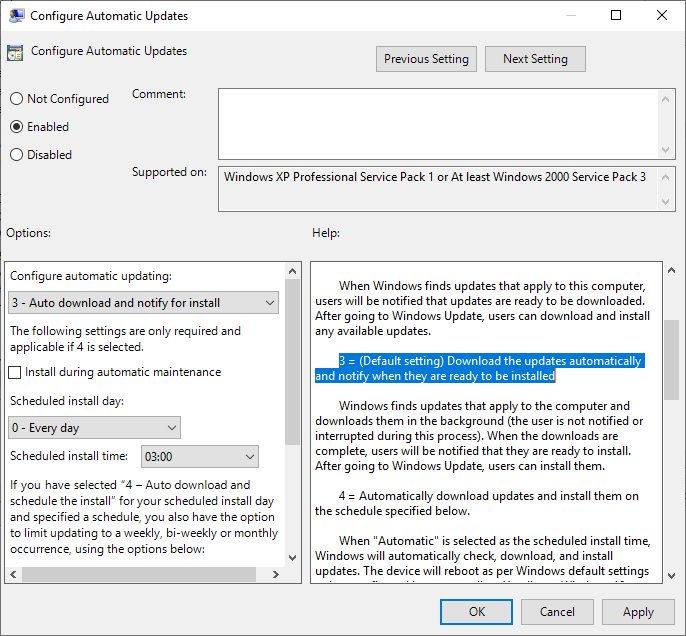
位置:『Computer Configuration』、『Polices』、『Administrative Templates』、『Windows Component』、『Windows Update』、『Configure Automatic Updates』
設定:『Enabled』、『3 = (Default setting) Download the updates automatically and notify when they are ready to be installed』
解釋:選擇自動下載Windows Update,再通知用戶作出安裝。
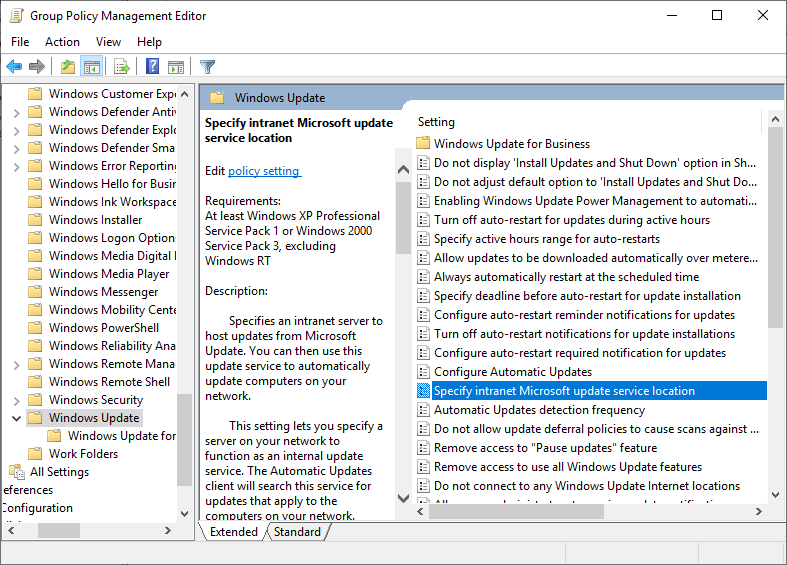
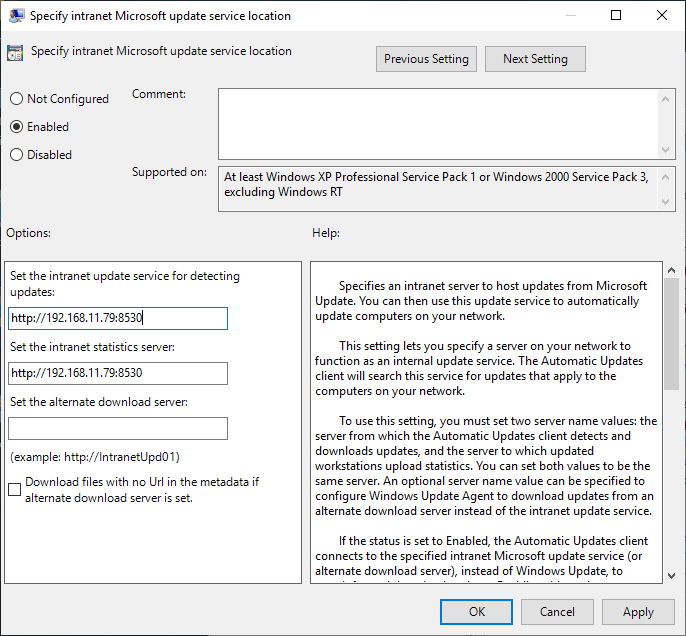
位置:『Computer Configuration』、『Polices』、『Administrative Templates』、『Windows Component』、『Windows Update』、『Specify intranet Microsoft Update Service Location』
設定:『Enabled』、『http://192.168.11.79:8350』、『http://192.168.11.79:8350』
解釋:輸入Windows Update伺服器IP地址及埠位。如不清楚埠位,可在IIS伺服器中找到。
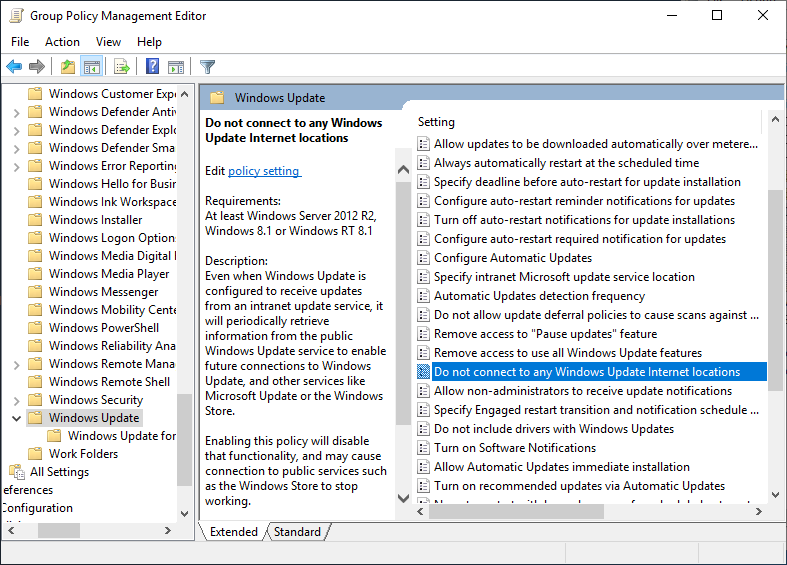
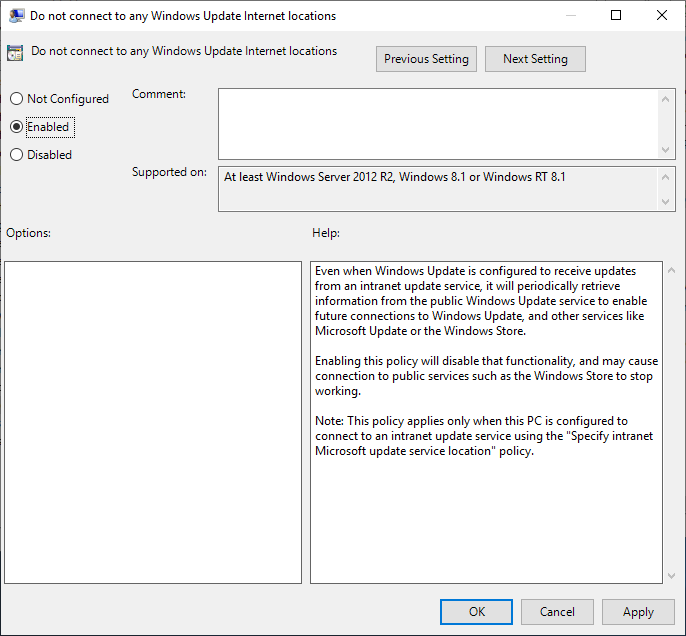
位置:『Computer Configuration』、『Polices』、『Administrative Templates』、『Windows Component』、『Windows Update』、『Do not connect to any Windows Update Internet locations』
設定:『Enabled』
解釋:Windows Update預設採用Dual scan更新方式,即在內部Windows Server Update Services伺服器找不到更新時,也同時使用對外MicrosoftWindows Server Update Services伺服器,為避免客戶端誤用對外伺服器,固設定為不存取對外伺服器。
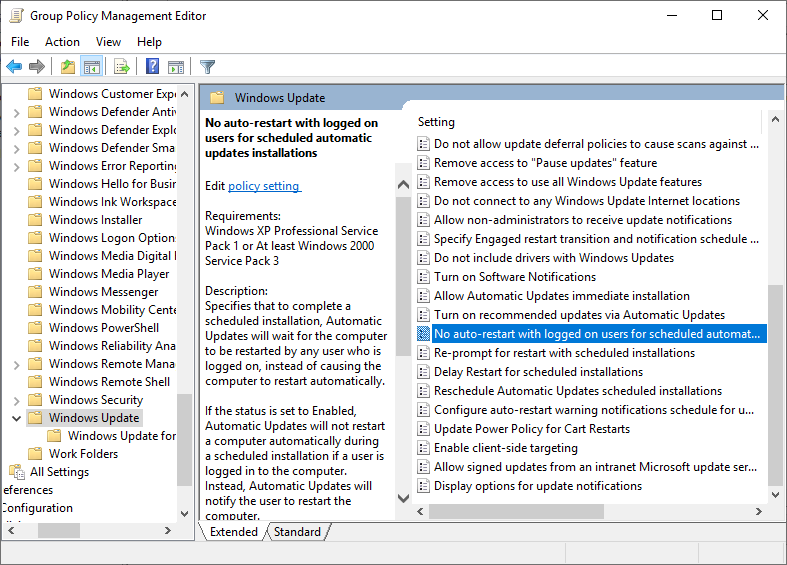
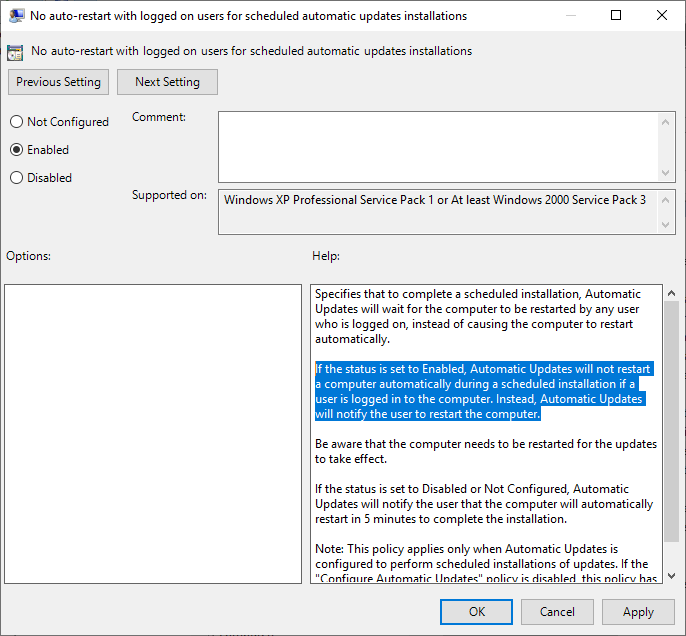
位置:『Computer Configuration』、『Polices』、『Administrative Templates』、『Windows Component』、『Windows Update』、『No Auto-Restart with logged on users for Scheduled installation』
設定:『Enabled』
解釋:更新後不自動重啟電腦。
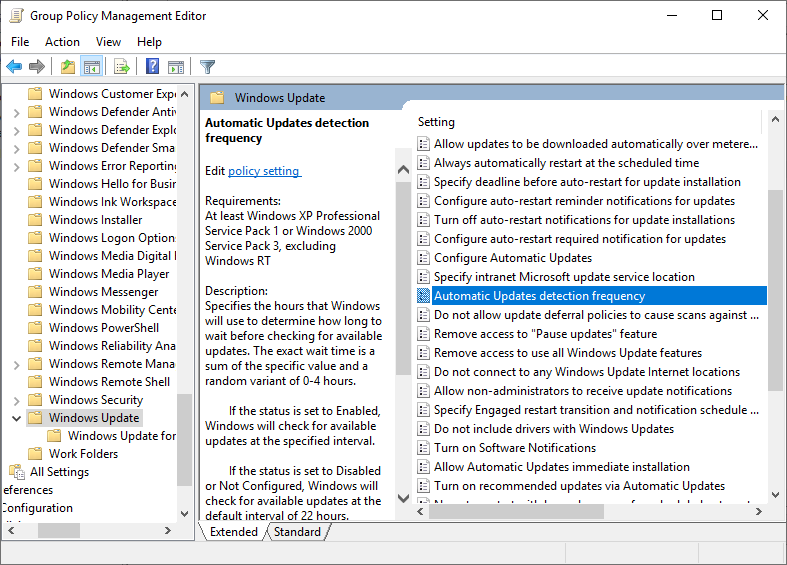
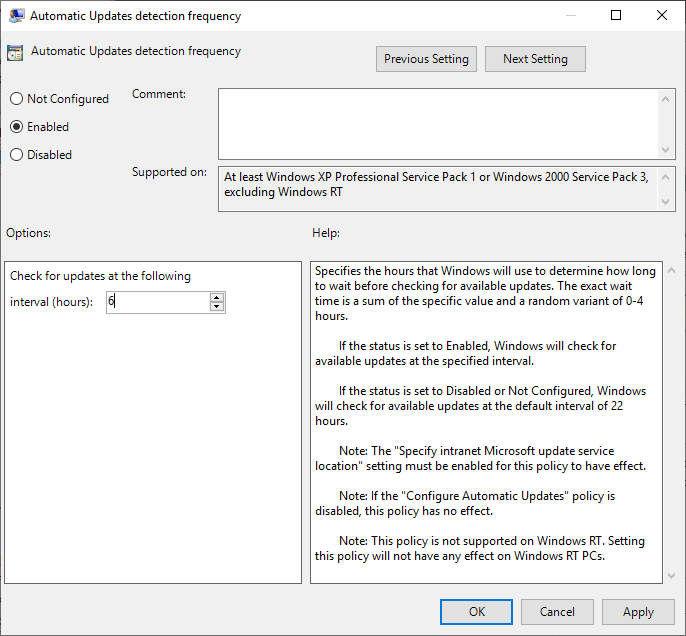
位置:『Computer Configuration』、『Polices』、『Administrative Templates』、『Windows Component』、『Windows Update』、『Automatic Update Detection Frequency』
設定:『Enabled』、『6』
解釋:每隔多久檢查一次更新。
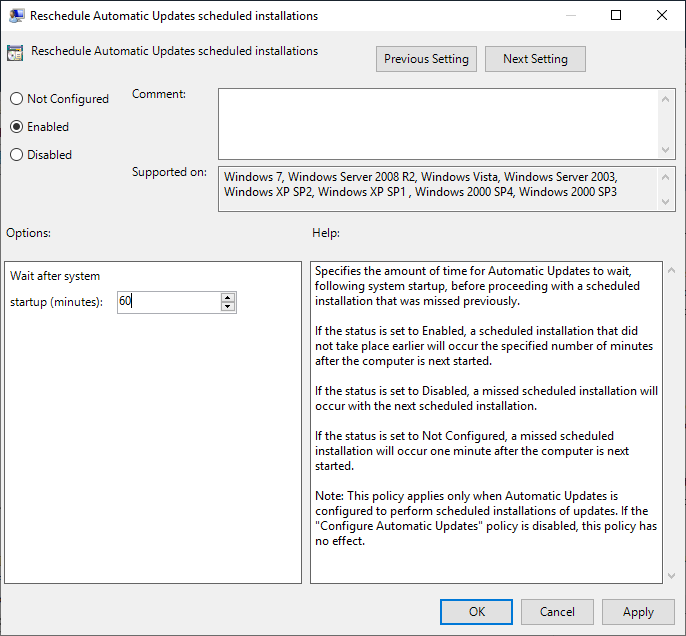
位置:『Computer Configuration』、『Polices』、『Administrative Templates』、『Windows Component』、『Windows Update』、『ReShedule the Automatic update scheduled installation』
設定:『Enabled』、『60』
解釋:當上一次沒有作出定期更新後,電腦下一次開機後多久再檢查更新。

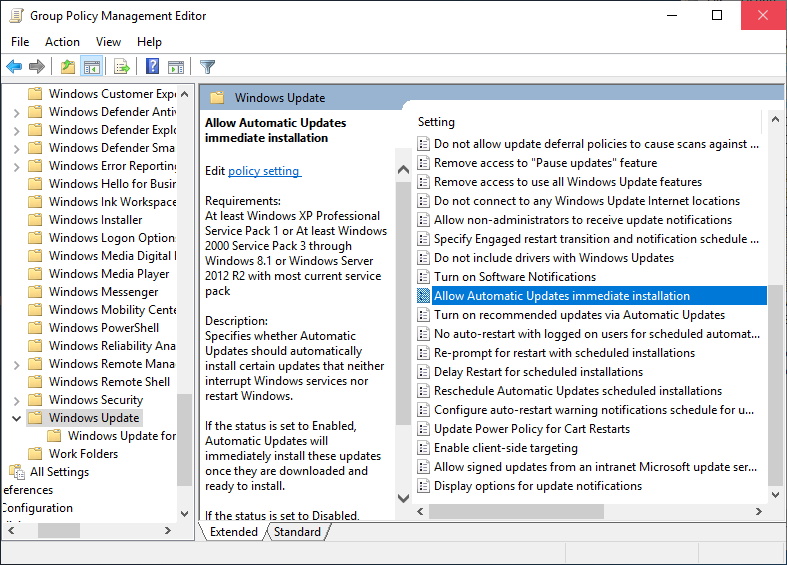
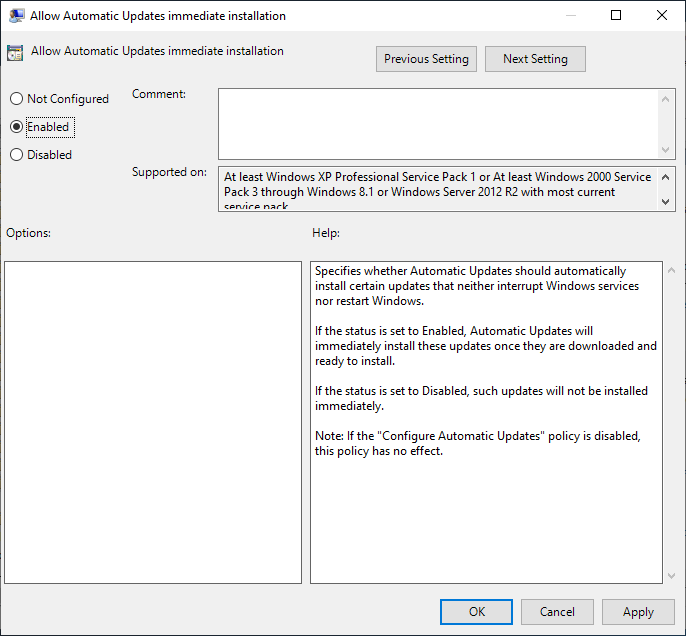
位置:『Computer Configuration』、『Polices』、『Administrative Templates』、『Windows Component』、『Windows Update』、『Allow Automatic Updates immediate installation』
設定:『Enabled』
解釋:下載後即時作出更新。
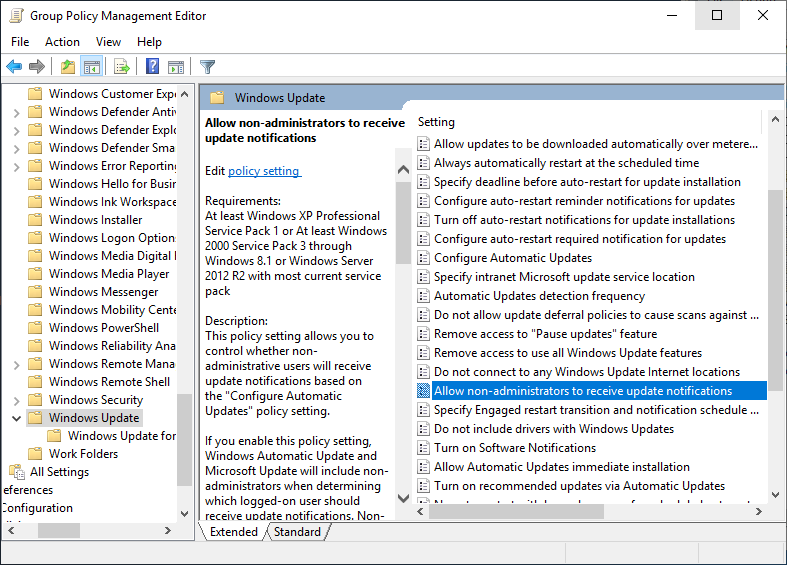
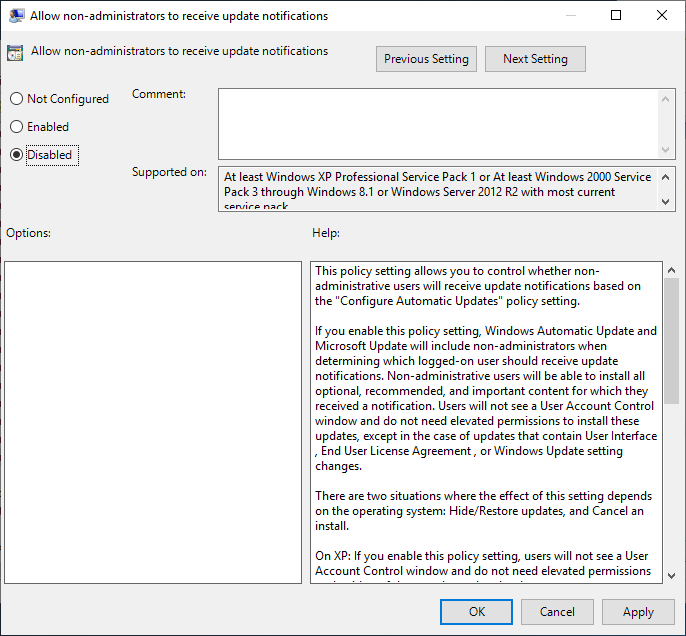
位置:『Computer Configuration』、『Polices』、『Administrative Templates』、『Windows Component』、『Windows Update』、『Allowa non-administrator to receive update notifications』
設定:『Disabled』
解釋:容許通知電腦上非管理員用戶更新資訊。
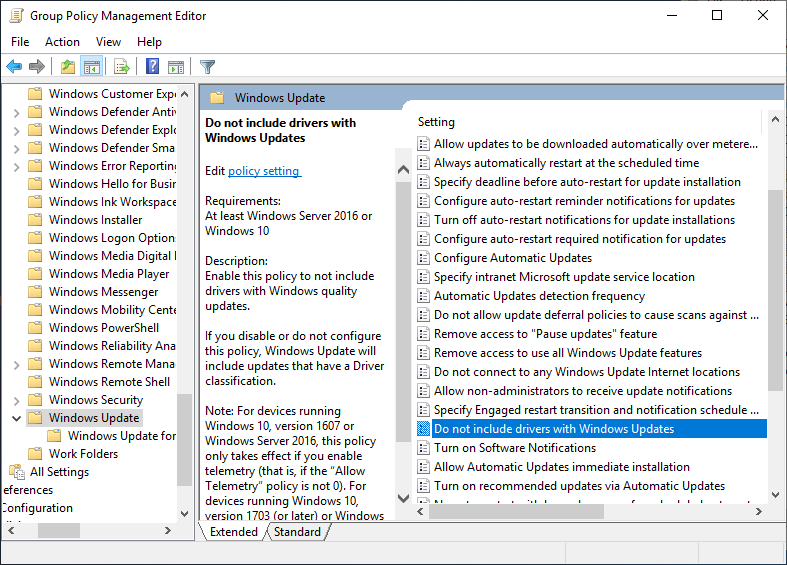
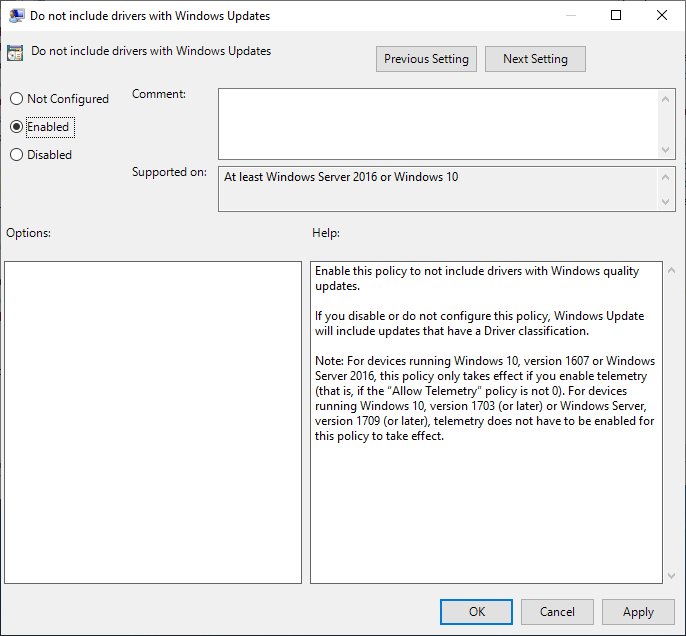
位置:『Computer Configuration』、『Polices』、『Administrative Templates』、『Windows Component』、『Windows Update』、『Do not include drivers with Windows Update』
設定:『Enabled』
解釋:不更新驅動程式。
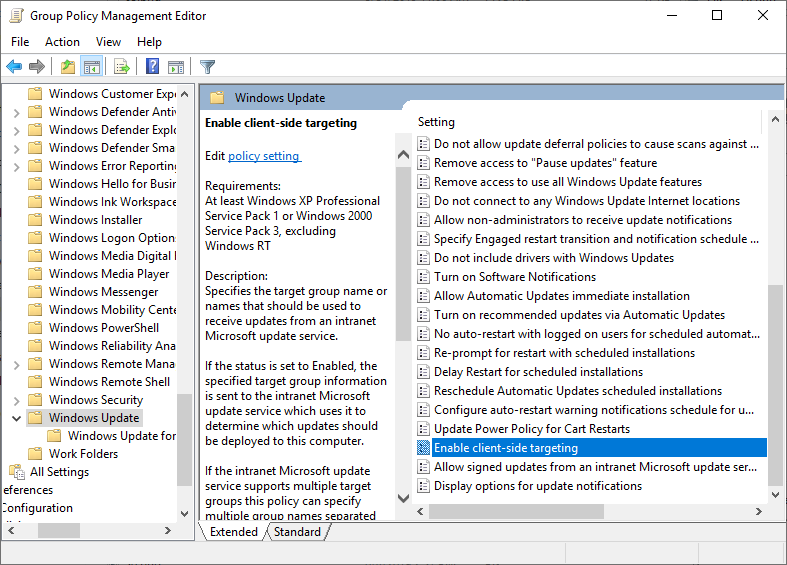
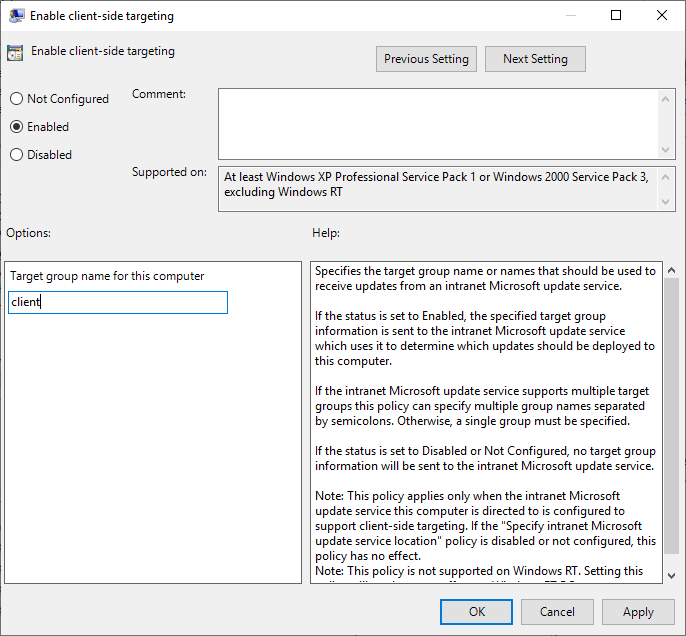
位置:『Computer Configuration』、『Polices』、『Administrative Templates』、『Windows Component』、『Windows Update』、『Enable Client – Side Targeting』
設定:『Enabled』、『client』
解釋:上面第18項題及的電腦電腦群組名稱,這裡設置相同的名稱,當GPO在客戶端執行後,有關電腦名稱便會直接出現在相關的電腦群組名內。
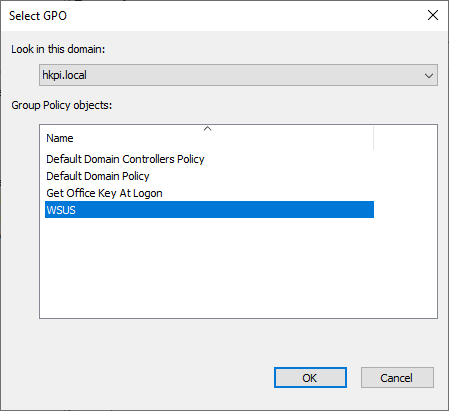
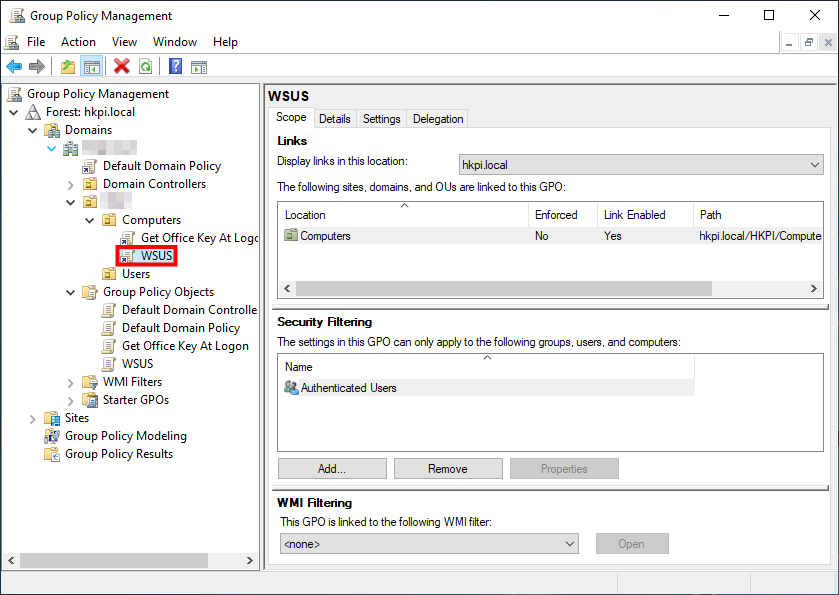
24. 在對應的電腦群組內,按滑鼠右鍵選擇『Link at Existing GPO』。
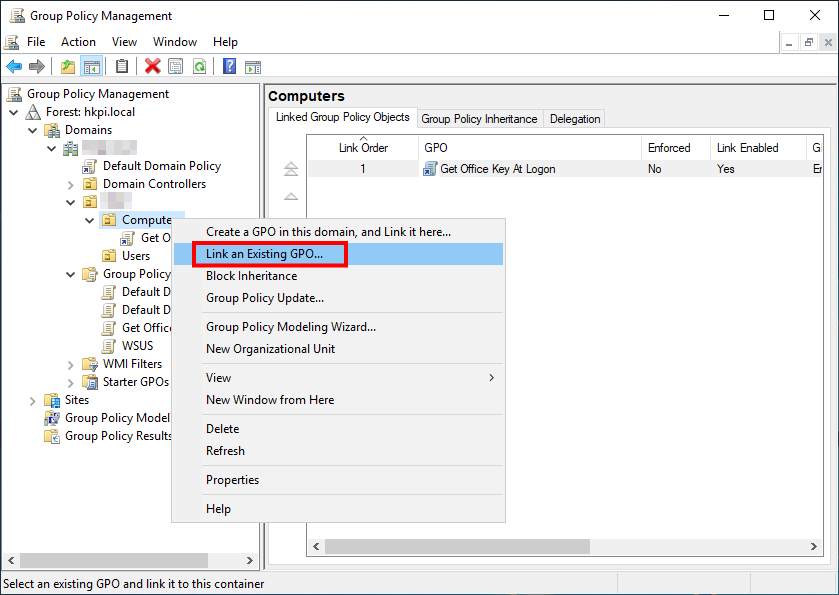
25. 將有關GPO加入。
26. 加入後會看到有關電腦群組內會執行的GPO。
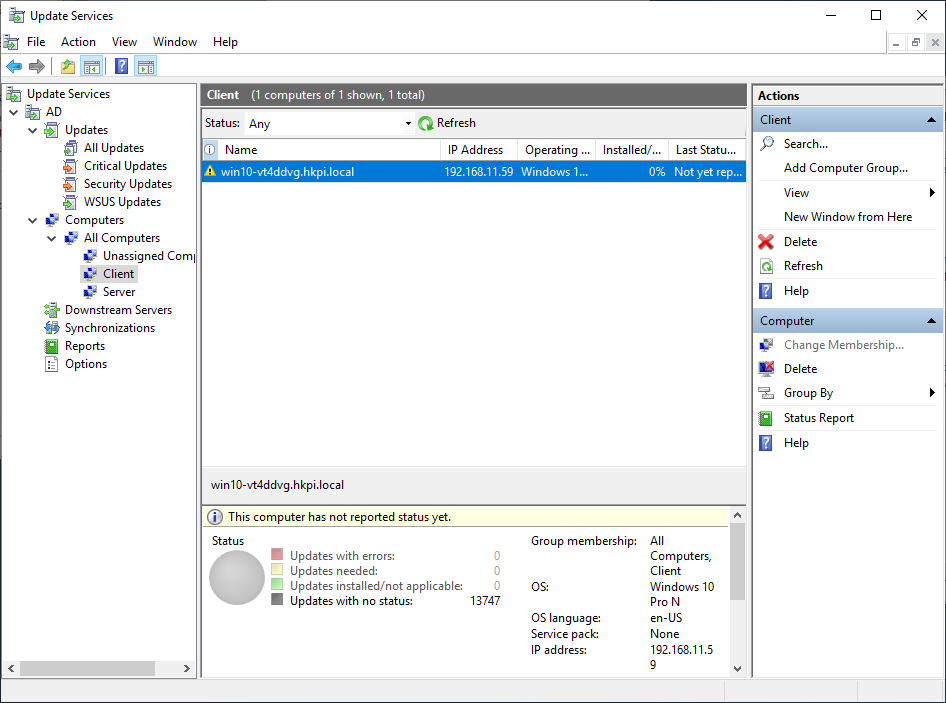
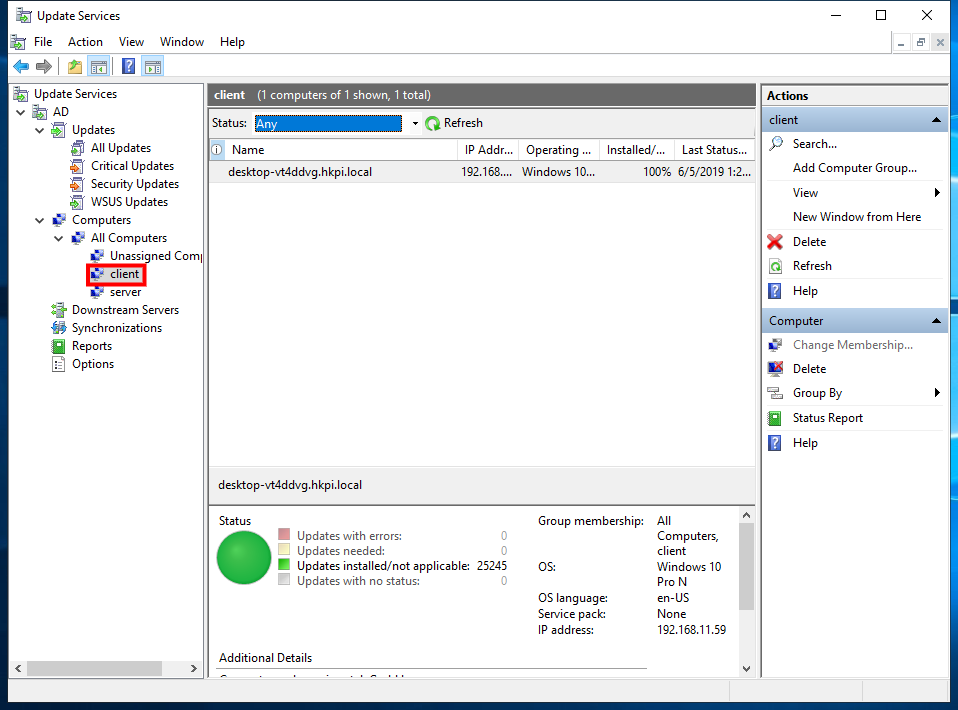
27. 只要在客戶端電腦執行Windows Update,有關電腦資訊便會加到Windows Server Update Services伺服器內。如在Windows Server Update Services伺服器看不到有有關客戶端電腦名稱,可在客戶端電腦執行『wuauclt.exe /detectnow /reportnow』,便可以在Windows Server Update Services伺服器看到客戶端電腦名稱。

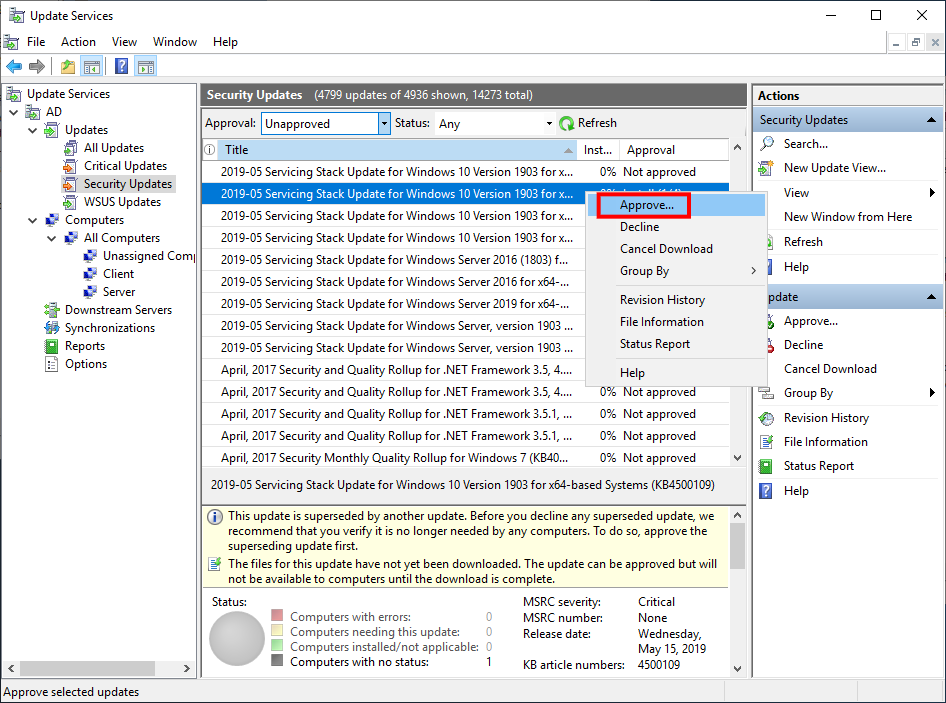
28. 如需要對客戶端電腦套用任何更新,先選擇需要的更新項目,滑鼠右鍵按『Approve』。
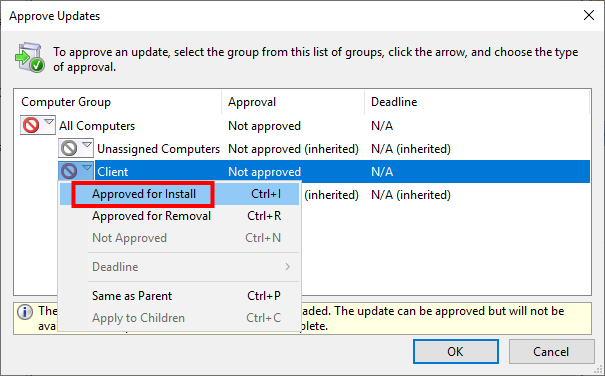
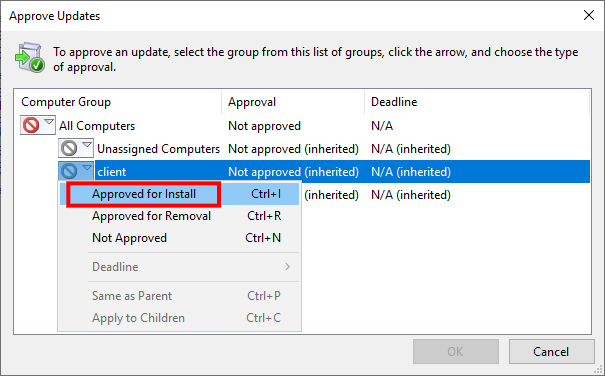
29. 選擇那一個電腦群組需要更新,滑鼠右鍵按『Approved for Install』。
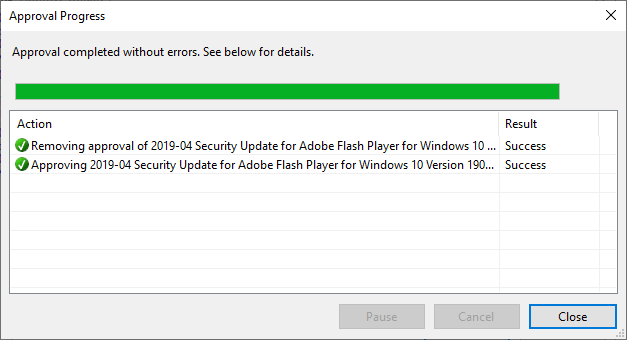
30. 系統會顯示是否出現錯誤。

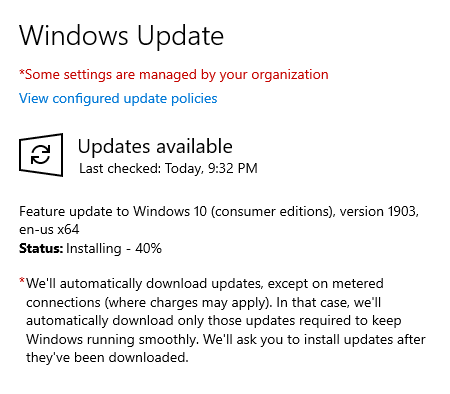
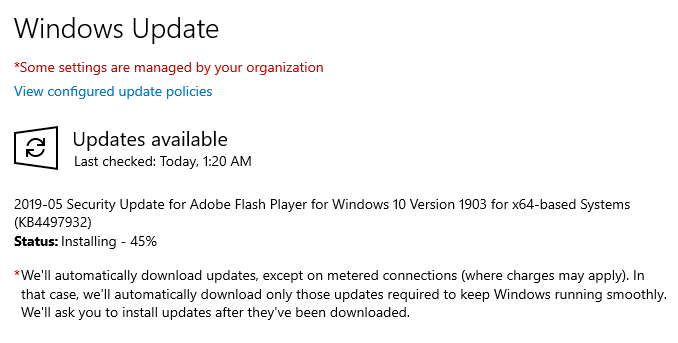
31. 在客戶端電腦執行一次Windows Update,會看到客戶端電腦出現相對應的更新。
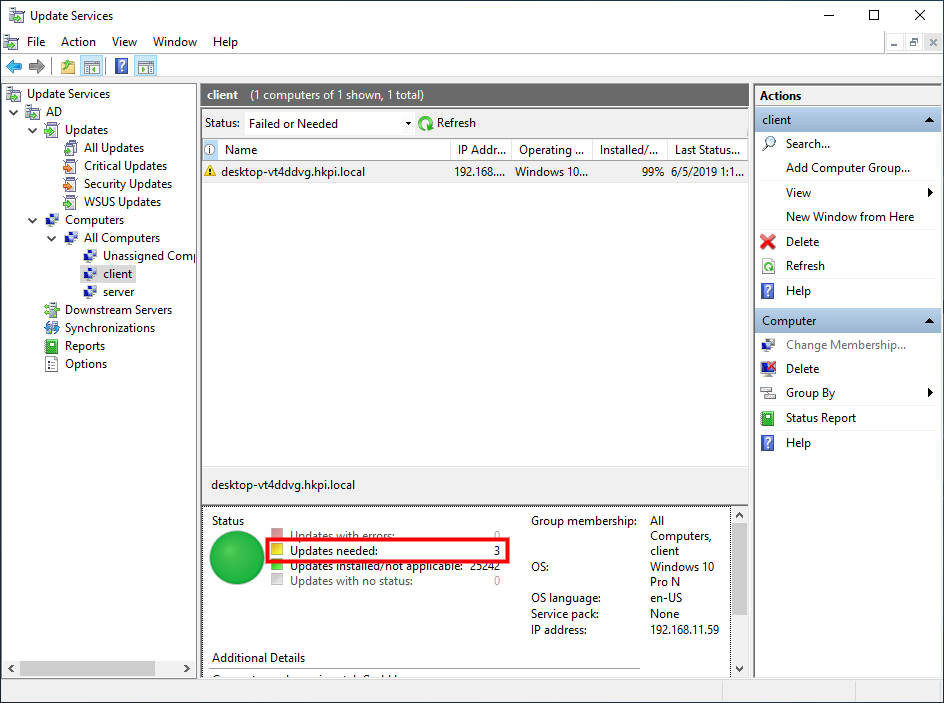
33. 而當Windows Server Update Services收到有些重要的更新,也會在系統中顯示那部電腦沒有更新。如本例子,可以看到還有3個更新沒有安裝,可以按『Updates needed』查看詳情。
34. 如之前沒有安裝『Microsoft Report Viewer 2012』及『Microsoft System CLR Types for SQL Server 2012』,便需要先『 Windows Server Update Services (Report Tools) 下載』才能繼續下面步驟。
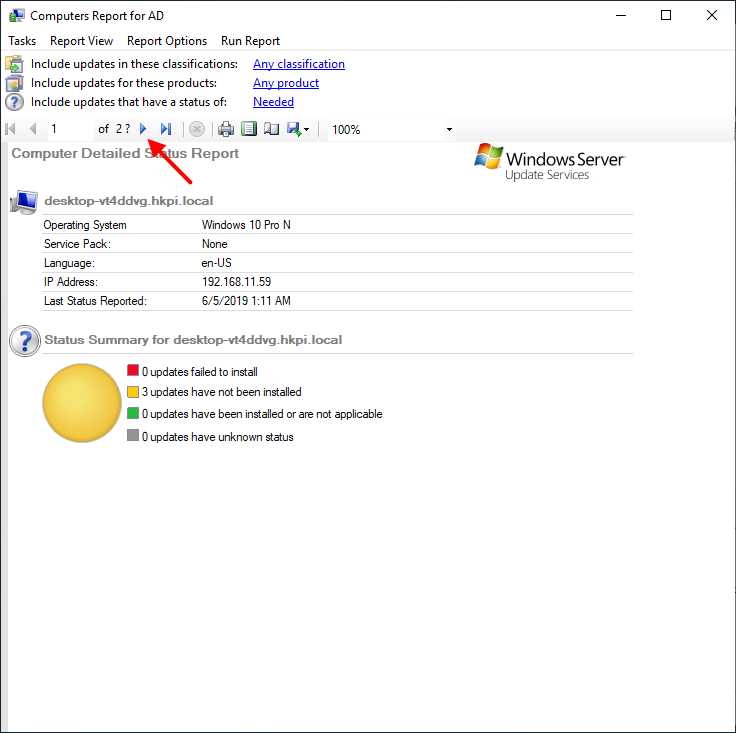
35. 第一頁只看到這部客戶端電腦問題詳情。
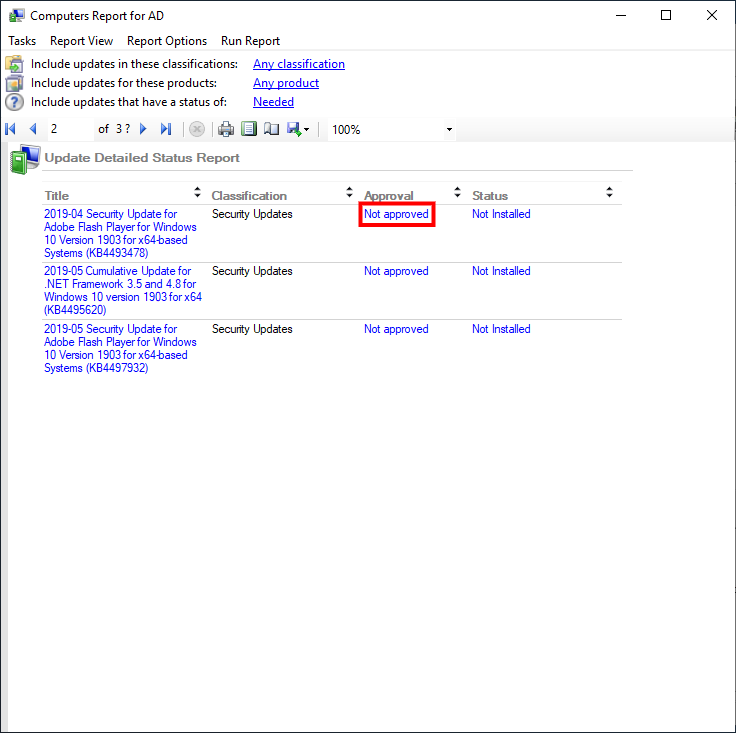
36. 跳到下一頁後,便看到3個還沒有安裝的更新,原來是沒有得到批准安裝。在『Not approved』位置按一下。
37. 打開『Approve Updates』視窗,選擇正確的電腦群組,以安裝選取的更新。
38. 系統會顯示是否出現錯誤。
39. 完成後,再看一次報告,3個更新已批准安裝,但客戶端電腦還未回應作出實際安裝。

40. 等候一段時間,客戶端電腦便會自行作出檢查,並安裝已批准的更新。
41. 一段時間後再返回Windows Server Update Services伺服器重新整理一次,便會看到客戶端電腦已回復正常。
發佈留言