
發佈日期:
分類:
如何利用Uploadify‧把檔案上傳至伺服器及在有需要時‧把上傳檔案刪除
又換了工作,當然老闆一定又有新要求,就是上傳檔案。看來不是太困難的工作,只不過,要求是要跟美國那個做出來的效果差不多。那不如直接問美國拿source code最好不過。
01. 廢話完了,又是工作的時間。之前一直有用開Uploadify這套軟件,作為上傳檔案的用途,今天就從這裡開始。
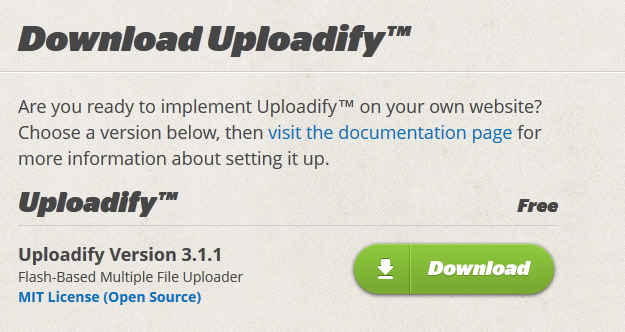
02. 先下載最新的Uploadify,現在版本是3.1.1。
03. 解壓檔案,到uploadify資料夾內。您也可以按自己要求,放到不同資料夾內。
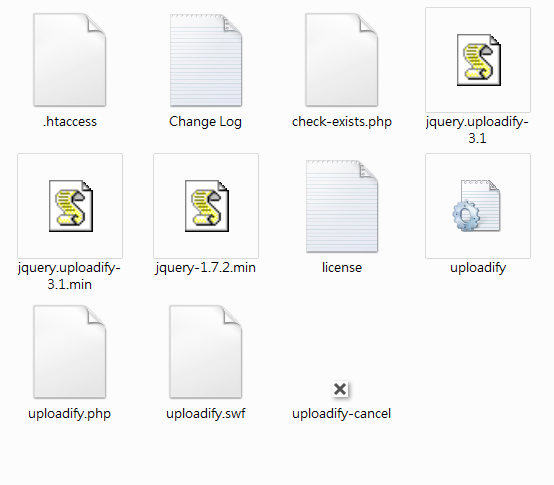
04. 針對今次要求,除了上傳檔案,還要同時對上傳的檔案作刪除。故首先建立需要的資料夾及檔案。uploadify資料夾是放置Uploadify的檔案;uploadify_upload_folder資料夾是放置上傳的檔案;uploadify_control.php是主檔案;uploadify_get_attach是將上傳的檔案顯示出來;uploadify_remove_attach是將上傳的檔案按用戶要求作刪除。
05. 編輯檔案,uploadify_control.php,貼上以下內容。
<!DOCTYPE html PUBLIC "-//W3C//DTD XHTML 1.0 Transitional//EN" "http://www.w3.org/TR/xhtml1/DTD/xhtml1-transitional.dtd">
<html xmlns="http://www.w3.org/1999/xhtml">
<head></head>
<body>
<?php
$folder = '/file/upload/uploadify_upload_folder';
?>
<link rel="stylesheet" type="text/css" href="./uploadify/uploadify.css">
<script type="text/javascript" src="./uploadify/jquery-1.7.2.min.js"></script>
<script type="text/javascript" src="./uploadify/jquery.uploadify-3.1.min.js"></script>
<script type="text/javascript">
$(function() {
$('#file_upload').uploadify({
'swf'              : './uploadify/uploadify.swf',
'uploader'         : './uploadify/uploadify.php',
'fileSizeLimit'    : '1MB',
'multi': true,
'auto'             : true,
'removeCompleted'  : true,
'removeTimeout'    : 0,
'fileTypeDesc'     : 'Support files',
'fileTypeExts'     : '*.jpg; *.gif; *.png;',
'method'           : 'POST',
'onUploadStart'    : function(file) {
$("#file_upload").uploadify("settings", "formData", {"folder": '<?php echo $folder; ?>'});
},
'onUploadComplete' : function(file) {
$("#attach_content").load("./uploadify_get_attach.php?folder=<?php echo $folder; ?>");
}
});
});

$(function() {
$('#attach_content').click(function() {
$('.remove').click(function() {
$("#attach_content").load("./uploadify_remove_attach.php?folder=<?php echo $folder; ?>&fid="+$(this).attr('id'));
});
});
});
</script>
<p>Attachment:</p>
<span class="support_format">Support format: jpg, png<br></span>
<input id="file_upload" name="file_upload" type="file" />
<input type="hidden" name="upload_folder" value="<? echo $folder; ?>">
<div id="attach_content"></div>
</body>
</html>
要留意有幾部份,其中$folder儲存的內容,需為上傳檔案對應$_SERVER[‘DOCUMENT_ROOT’]的實際位置。而用於顯示檔案上傳後的工作,就利用Uploadify內建的onUploadComplete函數,更新檔案清單。而如果因應需要,要每次建立不同資料夾,可利用類似以下的內容。
date_default_timezone_set('Asia/Hong_Kong');
$folder = date("Y-m-d-H-i-s").'-'.rand(10,99);
if (!file_exists($_SERVER["DOCUMENT_ROOT"].$folder)) {
mkdir ($_SERVER["DOCUMENT_ROOT"].$folder);
}
06. 打開/uploadify/uploadify.php檔案。
將原來的內容:
<?php
/*
Uploadify
Copyright (c) 2012 Reactive Apps, Ronnie Garcia
Released under the MIT License <http://www.opensource.org/licenses/mit-license.php>
*/

// Define a destination
$targetFolder = '/uploads'; // Relative to the root

if (!empty($_FILES)) {
$tempFile = $_FILES['Filedata']['tmp_name'];
$targetPath = $_SERVER['DOCUMENT_ROOT'] . $targetFolder;
$targetFile = rtrim($targetPath,'/') . '/' . $_FILES['Filedata']['name'];

// Validate the file type
$fileTypes = array('jpg','jpeg','gif','png'); // File extensions
$fileParts = pathinfo($_FILES['Filedata']['name']);

if (in_array($fileParts['extension'],$fileTypes)) {
move_uploaded_file($tempFile,$targetFile);
echo '1';
} else {
echo 'Invalid file type.';
}
}
?>
更改為以下內容:
<?php
/*
Uploadify
Copyright (c) 2012 Reactive Apps, Ronnie Garcia
Released under the MIT License <http://www.opensource.org/licenses/mit-license.php>
*/

// Define a destination
#$targetFolder = '/uploads'; // Relative to the root
$targetFolder = $_POST["folder"];

if (!empty($_FILES)) {
$tempFile = $_FILES['Filedata']['tmp_name'];
$targetPath = $_SERVER['DOCUMENT_ROOT'] . $targetFolder;
$targetFile = rtrim($targetPath,'/') . '/' . $_FILES['Filedata']['name'];

// Validate the file type
# $fileTypes = array('jpg','jpeg','gif','png'); // File extensions
$fileParts = pathinfo($_FILES['Filedata']['name']);

#if (in_array($fileParts['extension'],$fileTypes)) {
move_uploaded_file($tempFile,$targetFile);
#echo '1';
#} else {
#echo 'Invalid file type.';
#}
}
?>
更改的內容,主要是利用$_POST[“folder”]函數,取得上傳資料夾位置。另外因為uploadify.php的設定,已設定只接受某些檔案可以上傳,故同時更改其設定。
07. 編輯檔案,uploadify_get_attach.php,貼上以下內容。
<?php
if (isset($_GET["folder"])) {
echo 'Uploaded filelist:<br>';
$folder = $_GET["folder"];
$path = $_SERVER["DOCUMENT_ROOT"].$folder.'/*.*';
$i = 1;
foreach (glob($path) as $filename) {
echo '<span class="remove" id="'.$i.'" style="padding: 8px 10px 8px 0;"><img src="./uploadify/uploadify-cancel.png" border="0" align="absmiddle" title="Remove file"></span>';
echo basename($filename).'<br>';
$i++;
}
echo '<p></p>';
}
?>
此程式主要是顯示已上傳的檔案清單,及對每個上傳檔案建立一個id,以便之後如果需要刪除檔案時,以此id作為參考。
08. 編輯檔案,uploadify_remove_attach.php,貼上以下內容。
<?php
if (isset($_GET["folder"]) && isset($_GET["fid"])) {
$folder = $_GET["folder"];
$fid = $_GET["fid"];
$path = $_SERVER["DOCUMENT_ROOT"].$folder.'/*.*';
$i = 1;
foreach (glob($path) as $filename) {
if ($i == $fid) {
unlink ($filename);
}
$i++;
}

$path = $_SERVER["DOCUMENT_ROOT"].$folder.'/*.*';
if (count(glob($path)) > 0) {
echo '<span style="margin: 0 0 8px 0; color: green;">Upload filelist:</span><br>';
$i = 1;
foreach (glob($path) as $filename) {
echo '<a class="remove" id="'.$i.'" href="#remove_position" style="padding: 8px 10px 8px 0;"><img src="./images/remove.png" border="0" align="absmiddle" title="Remove file"></a>';
echo basename($filename).'<br>';
$i++;
}
echo '<p></p>';
}
}
?>
當用戶按下刪除鍵時,會在主程式uploadify.php檔案中,執行$(‘#attach_content’).click(function()函數,以便刪除指定檔案。刪除之後,會再更新檔案清單。大家可能會問,Uploadify不是已內建了OnCancel函數嗎?但此函數,主要針對檔案在加入檔案清單,但未曾作上傳時,在清單內移除時才會被觸發,故檔案如已經上傳,此函數便不能用來刪除檔案了。
09. 最後,當然是測試一下成果。
發佈留言