
分類:
如何在Windows x64下‧解決apache安裝OpenSSL證書時出現的『The requested operation has failed!』錯誤
今天換了新的網頁寄存公司,順便在家中電腦重新設定apache及SSL。重新啟動apache時,便會出現『The requested operation has failed!』的錯誤。
01. 按之前的方法,設定好apache。當然,今天用了x64的Windows,路徑也要相應地更改。
set OPENSSL_CONF=C:\\Program Files (x86)\\Apache Software Foundation\\Apache2.2\\conf\\openssl.cnf
cd C:\\Program Files (x86)\\Apache Software Foundation\\Apache2.2\\bin
openssl rsa -in privkey.pem -out server.key
del .rnd
openssl x509 -in server.csr -out server.cert -req -signkey server.key -days 3650
move server.cert "c:\\Program Files (x86)\\Apache Software Foundation\\Apache2.2\\conf"
move server.key "c:\\Program Files (x86)\\Apache Software Foundation\\Apache2.2\\conf"
編輯C:\\Program Files (x86)\\Apache Software Foundation\\Apache2.2\\conf\\httpd.conf檔案。
將:
#LoadModule ssl_module modules/mod_ssl.so
更改為:
LoadModule ssl_module modules/mod_ssl.so
將:
#Include conf/extra/httpd-ssl.conf
更改為:
Include conf/extra/httpd-ssl.conf
編輯C:\\Program Files (x86)\\Apache Software Foundation\\Apache2.2\\conf\\extra\\httpd-ssl.conf檔案。
確認SSLCertificateFile及SSLCertificateKeyFile指向剛才複製檔案名稱。
SSLCertificateFile "C:/Program Files (x86)/Apache Software Foundation/Apache2.2/conf/server.cert"
SSLCertificateKeyFile "C:/Program Files (x86)/Apache Software Foundation/Apache2.2/conf/server.key"
02. 完成之後,重新啟動apache時,便出現『The requested operation has failed!』的錯誤。

03. 看看apache的log檔案。是一堆不相關的問題,以後就算您怎樣重新啟動apache,也不會再出現新的log內容。
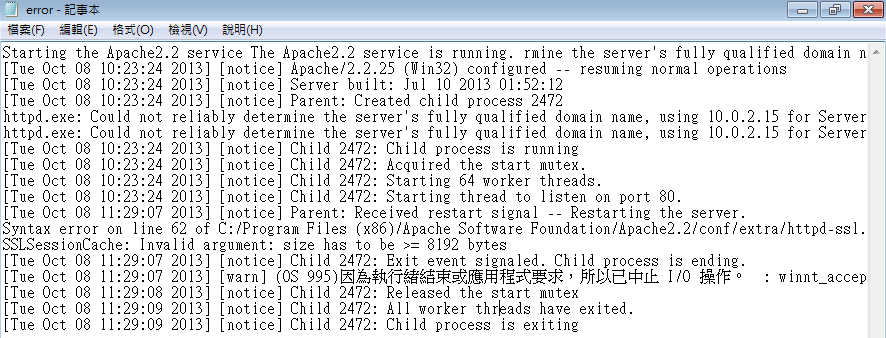
04. 一步步檢查後,發現問題出自C:\\Program Files (x86)\\Apache Software Foundation\\Apache2.2\\conf\\extra\\httpd-ssl.conf檔案這一句內容上。
SSLSessionCache "shmcb:C:/Program Files (x86)/Apache Software Foundation/Apache2.2/logs/ssl_scache(512000)"
05. 是那一個高手把內容改成這樣呢?正確應該是:
SSLSessionCache "dbm:C:/Program Files (x86)/Apache Software Foundation/Apache2.2/logs/ssl_scache"
06. 更改後儲存檔案,重新啟動apache,您會發現可以啟動了及SSL也可以使用了。
發佈留言