
如何利用Microsoft Azure服務‧建立Postfix郵件伺服器及設定SendGrid為SMTP Relay Server
01. 更新Ubuntu系統。
sudo apt update
sudo apt upgrade
02. 設定好hostname。
sudo hostname example.com
03. 設定好/etc/hostname檔案內容。
sudo nano /etc/hostname

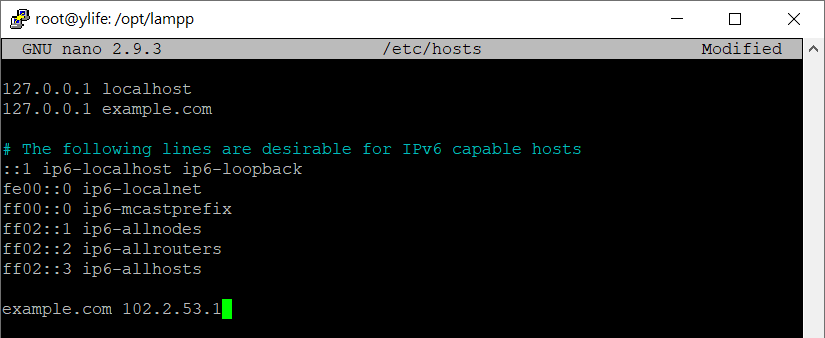
04. 設定好/etc/hosts檔案內容。
sudo nano /etc/hosts
127.0.0.1 example.com
example.com <Your server IP>
05. 重新啟動系統。
sudo reboot
06. 安裝Postfix。
sudo DEBIAN_PRIORITY=low apt install postfix
07. 設定Postfix。
General type of mail configuration: Internet Site
System mail name: example.com
Root and postmaster mail recipient: <default value>
Other destinations to accept mail for (blank for none): localhost.example.com, example.com, localhost_
Force synchronous updates on mail queue: No
Local networks: 127.0.0.0/8 [::ffff:127.0.0.0]/104 [::1]/128__
Mailbox size limit (bytes): 0
Local address extension character: +
Internet protocols to use: all
08. 假設用戶名稱為『Ubuntu』,建立用戶郵箱。
sudo mkdir -p /home/<user>/Maildir/{cur,new,tmp}
09. 將郵箱資料夾權限設定為該用戶。
sudo chown ubuntu:ubuntu Maildir/ -R
10. 設定Postfix用戶預設的郵箱位置。
sudo postconf -e 'home_mailbox= Maildir/'
11. 順便設定好Let’s Encrypt的SSL證書。
sudo nano /etc/postfix/main.cf
smtpd_tls_cert_file = /etc/letsencrypt/live/exmaple.com/fullchain.pem
smtpd_tls_key_file = /etc/letsencrypt/live/exmaple.com/privkey.pem
smtpd_tls_CAfile = /etc/letsencrypt/live/exmaple.com/chain.pem
smtpd_use_tls = yes
12. 重新啟動Postfix服務。
sudo systemctl restart postfix
13. 在Microsoft Azure Marketplace服務中,已設有SendGrid服務,可以直接在這裡設定帳戶。

14. 但最便宜的價錢是USD9.95/月。

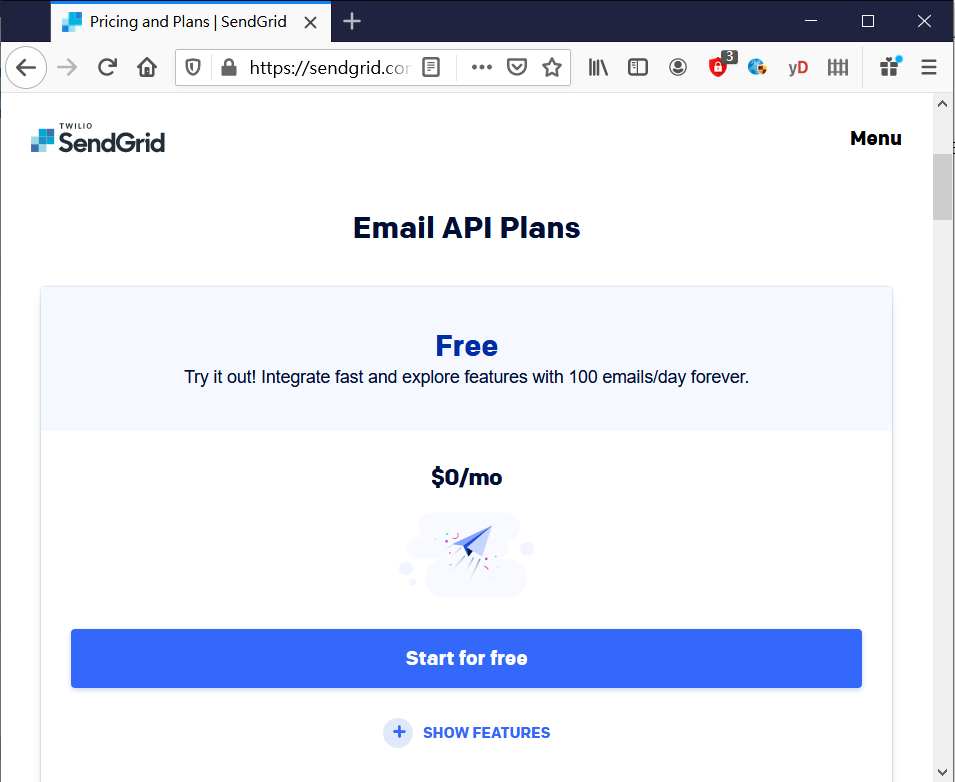
15. 而今次會用SendGrid網站直接提供的免費帳戶。每日可發100個免費電郵。
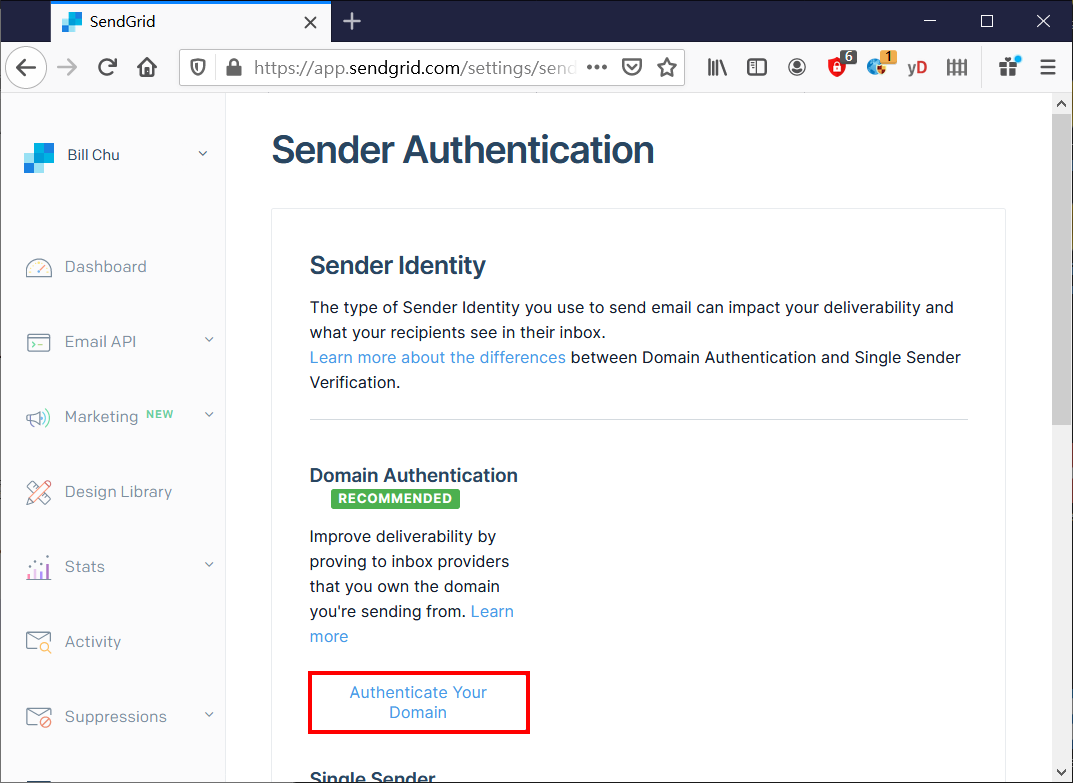
16. SendGrid可以設定以用戶或網域認證來發送電郵。為方便Postfix發送電郵,當然是設定為網域認證。
17. 選取你現時的網域公司,今次用的是Godaddy。

18. 輸入會使用SendGrid服務的網域。

19. 將SendGrid提供的資料,設定在Godaddy DNS設定內。
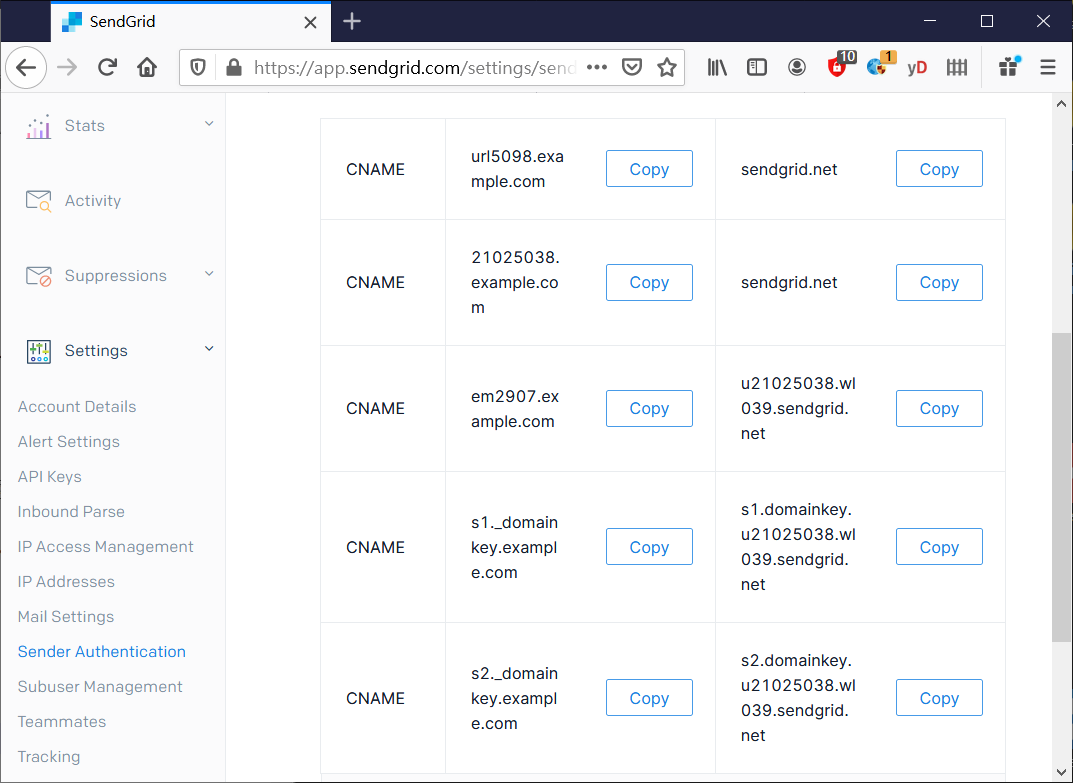
20. 但不知是Godaddy問題,定是SendGrid問題,以今次SendGrid提供的資料,在Godaddy設定DNS時,Host位置是不需要加入網域名稱。
SendGrid提供資料:
CNAME	url5098.example.com	sendgrid.net
CNAME	21025038.example.com	sendgrid.net
CNAME	em2907.example.com	u21025038.wl039.sendgrid.net
CNAME	s1._domainkey.example.com	s1.domainkey.u21025038.wl039.sendgrid.net
CNAME	s2._domainkey.example.com	s2.domainkey.u21025038.wl039.sendgrid.net
Godaddy設定資料:
CNAME	url5098	sendgrid.net
CNAME	21025038	sendgrid.net
CNAME	em2907	u21025038.wl039.sendgrid.net
CNAME	s1._domainkey	s1.domainkey.u21025038.wl039.sendgrid.net
CNAME	s2._domainkey	s2.domainkey.u21025038.wl039.sendgrid.net
21. 一切也沒有問題,便會看到已被SendGrid認證的網域。

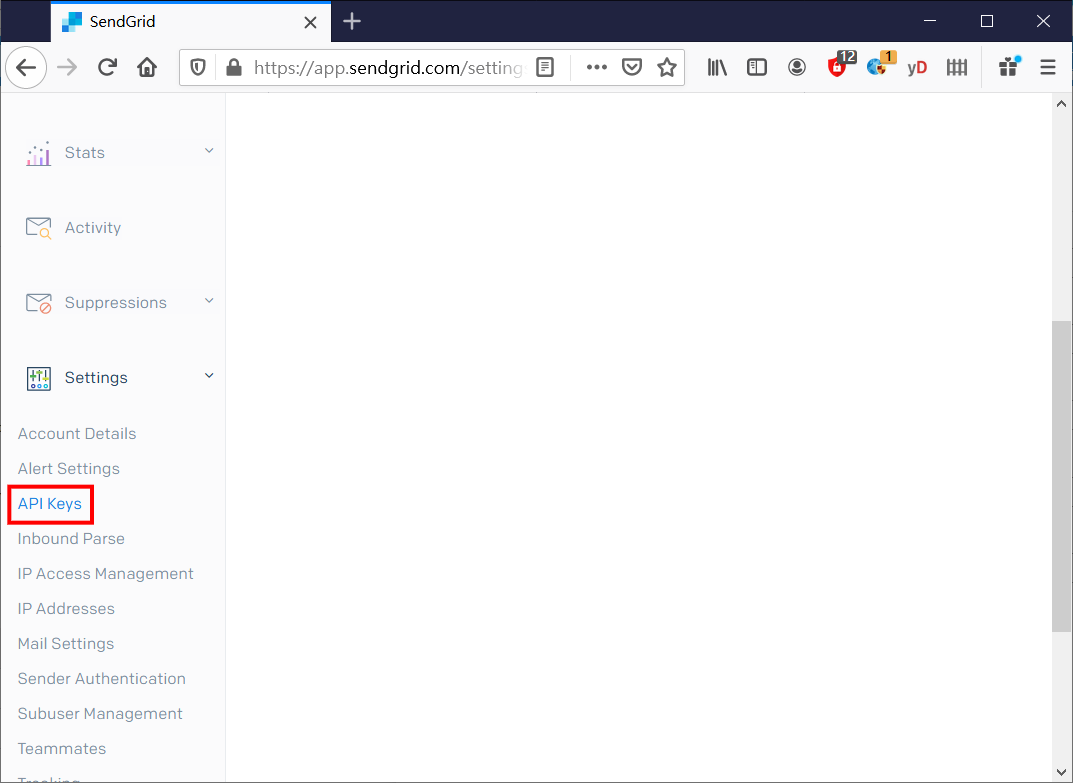
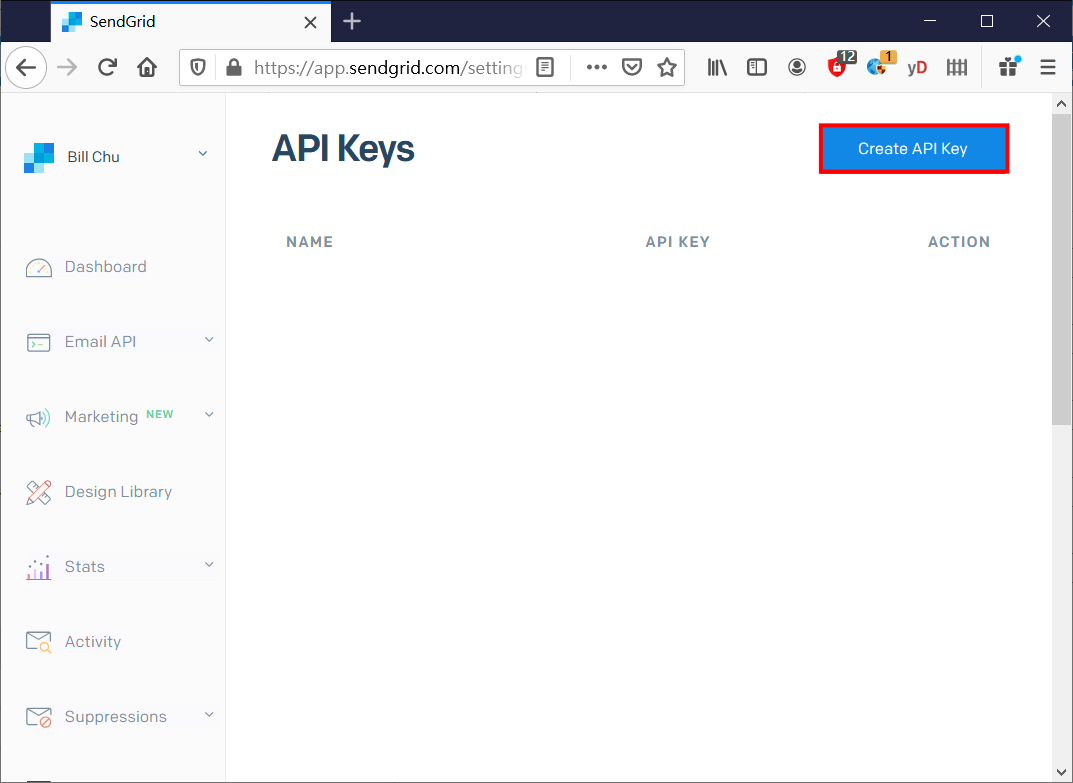
22. 設定SendGrid新的API Key。
23. 輸入API Key名稱,並選擇權限。
24. 產生的API Key。

25. 設定Postfix。打開『/etc/postfix/main.cf』檔案。一直以為設定是以『smtpd_xxxxxx』開始,攪了大半天,先知道這位置一定要以『smtp_xxxxxx』開始,否則每次使用SendGrid發送電郵,也會出現『550 Unauthenticated Senders Not Allowed』錯誤。
sudo nano /etc/postfix/main.cf
smtp_sasl_auth_enable = yes
smtp_sasl_password_maps = hash:/etc/postfix/sasl_passwd
smtp_sasl_security_options = noanonymous
smtp_sasl_tls_security_options = noanonymous
smtp_tls_security_level = encrypt
header_size_limit = 4096000
relayhost = [smtp.sendgrid.net]:587
26. 設定Postfix使用SendGrid提供的API Key。
sudo nano /etc/postfix/sasl_passwd
[smtp.sendgrid.net]:587 apikey:<SendGrid API Key>
27. 保護sasl_passwd檔案內容及設定只有root才能存取內容。
sudo postmap /etc/postfix/sasl_passwd
sudo chown root:root /etc/postfix/sasl_passwd /etc/postfix/sasl_passwd.db
sudo chmod 0600 /etc/postfix/sasl_passwd /etc/postfix/sasl_passwd.db
28. 重新啟動Postfix服務。
sudo systemctl restart postfix
29. 使用Postfix發信,如設定無誤,對方便會收到由exmaple.com發出,經SendGrid SMTP Relay服務的電郵。
發佈留言